Learn how to make a DIY Origami Lucky Star Garland ... then use the homemade garland to decorate your home or hang on your Christmas tree!
This post contains affiliate links.
I have a total Charlie Brown Christmas tree. My husband and I bought it at Walgreens last year ... very classy, I know.
This petite tree is actually quite adorable, although you can see right through it. That's part of the charm though, right?
I love doing a project or two to add to my Christmas stash every year, and I thought that a homemade garland would complement my tree's quirks.
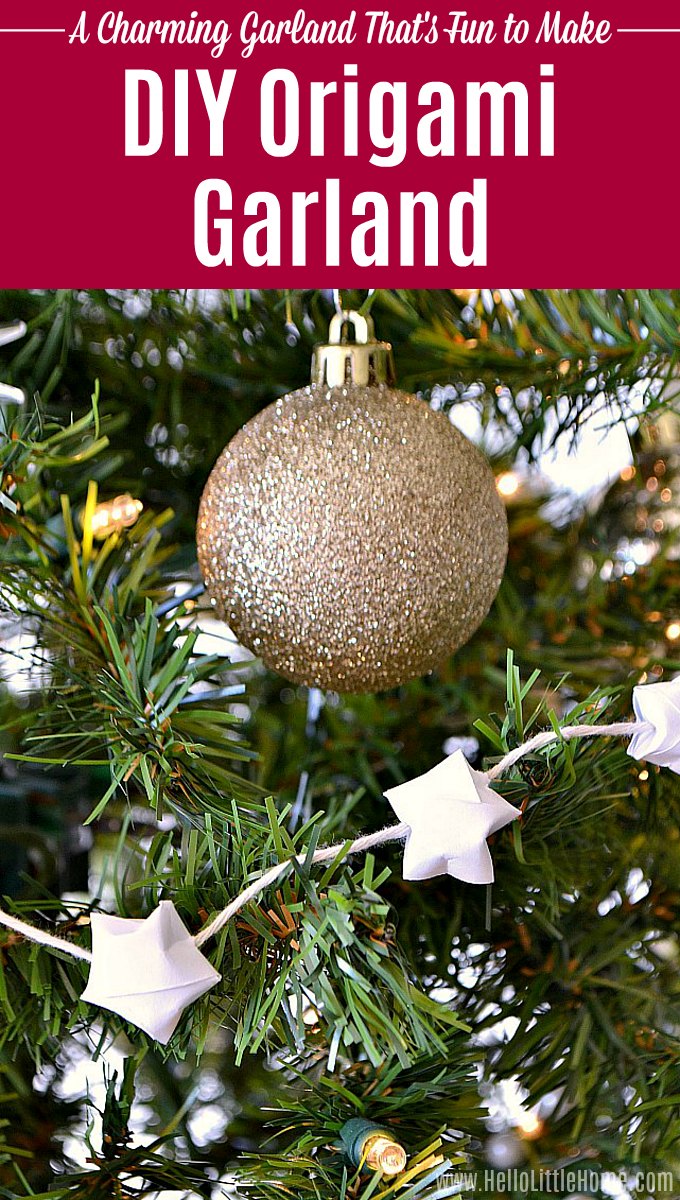
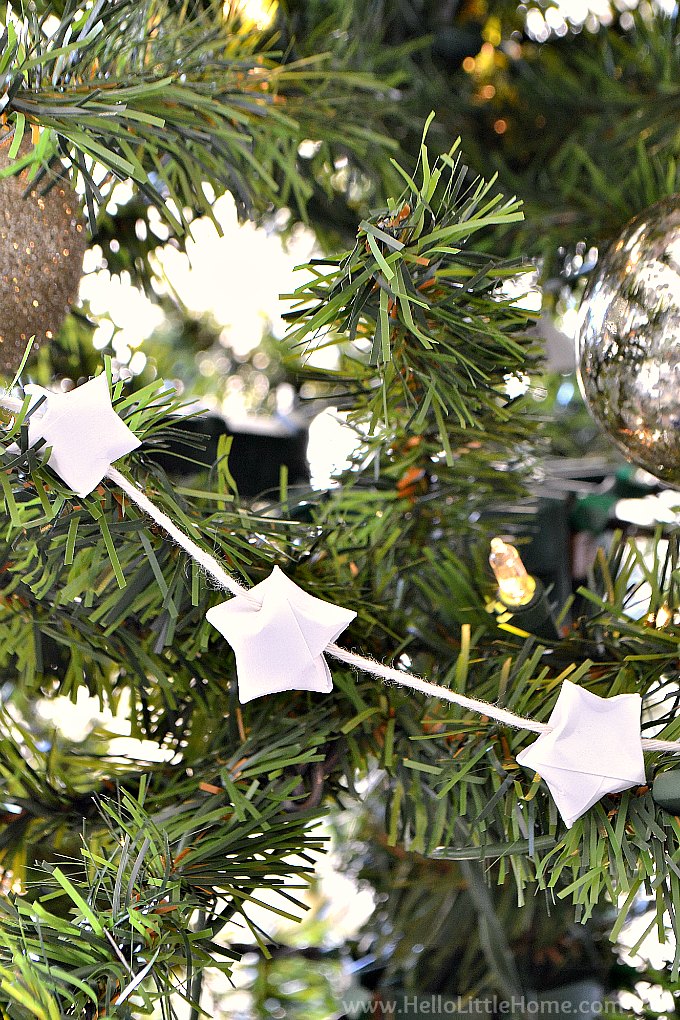
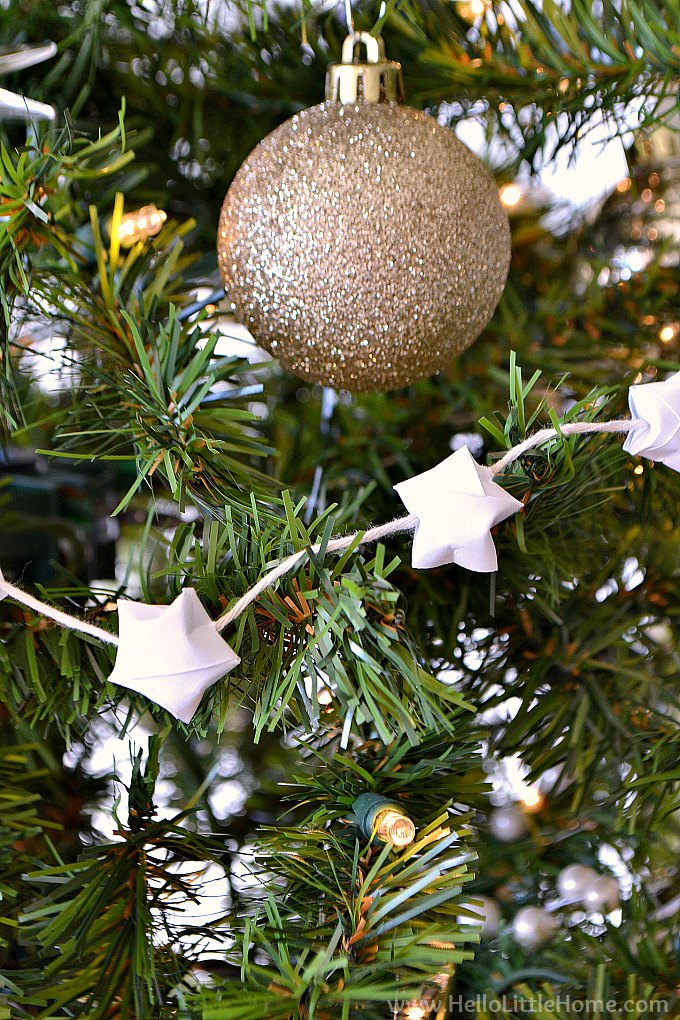
My DIY Origami Lucky Star Garland turned out so cute that I had to share it with you!
DIY Origami Lucky Star Garland
It's been a while since I've done origami, so this was a fun project. I used the Lucky Star pattern, which is super easy once you get the hang of it.
The best thing about this DIY Origami Lucky Star Garland is that you don't need origami paper. Regular old printer paper works, as do magazine pages and other decorative papers.
After I created about a bajillion of these little guys, I used a little string to create the DIY Origami Lucky Star Garland. It turned out so sweet, and the stars are perfectly wonky, just like my tree!
By the way, I originally found the tutorial for these Lucky Stars on Origami Fun. Head over there for additional visuals, if you need more help.

How to Make an Origami Garland
Read to make your own DIY origami Christmas garland? Here's how to do it!
Garland Supplies
Want to make your own DIY Christmas tree garland? Here's what you'll need:
- plain white printer paper, magazine pages, thin decorative paper, OR origami star paper
- scissors or a utility knife
- twine
- long sewing needle
How to Fold Origami Lucky Stars
First things first, you need paper. Although I made my own origami star paper, you can purchase origami star paper in many different colors and shapes.
Purchasing the paper is definitely the easy route. But if you want to make your own, start by cutting a bunch of strips of paper (use a lightweight paper, like printer paper).
You can use a scissors the cut the strips or a utility knife if you want to be more precise. The strips should measure about ½-inch wide and about 11 to 12-inches long.
To start a star, tie a knot in the end of one strip. Pull the end to tighten it up.

Tuck the short end of the strip into the fold.
It should resemble a pentagon.

Wrap the long end of the strip around the pentagon, following the pentagon's contours, until you reach the end of the strip.
Avoid making sharp folds as you wrap the paper. This will make it easier for the star to puff up later.

Tuck in the end so you have a self-enclosed pentagon.

Use your finger to make a crease in the middle of each pentagon side. The star should pouf up as you make the creases.
Pro tip: it took me a few tries to get these little stars to behave, so don't give up right away. Once you get the hang of it, they go really quickly.

How to String Origami Lucky Stars
OK, so you mastered how to make origami lucky stars. Now you need to make a ton of them! The garland for my little tree took about 90 stars, and it took about an hour to fold them. So get comfortable with your favorite TV program!
Once your stars are done, cut a long piece of string. The length of the string will depend on how long you want your garland. You can also create multiple, shorter garlands to make them easier to handle.
Thread the string on your needle, then pierce the needle through the side of the star. Pull it all the way through and slide the star to the opposite end of the string. Reshape the star, if necessary.
Repeat this process with the remaining stars, spacing them about an inch-and-a-half apart on the string.

After you've strung all the stars, tie a knot on either end of the string.
Hang up your DIY Origami Lucky Star Garland, then stand back and admire your handiwork!
How cute are those little stars? I'm already brainstorming other ways I can use them!
Love this DIY Origami Garland?
I hope you enjoyed this fun Christmas craft! If you enjoyed this DIY garland, then make sure to check out these other holiday crafts, too:
- DIY Wood Snowflake Coasters
- DIY Cardboard Gingerbread Ornaments
- Mini Christmas Stockings
- DIY Vintage Christmas Ornaments

Are you planning any DIY holiday projects?

Horrible tutorial I didn’t get anything I already was stuck at the first step
Most helpful tutorial yet!! Thank you
You're welcome, Astara! I'm so glad you found it helpful 🙂
I love these, they are pretty. My son loves origami. He'd have fun making these!
These are the cutest and look great in multi colour too!
Oooooh these are totally cool! I bet my little guy will love making these - he knows how to make paper boats and hats, but stars are going to get him very excited! 😀
These are so adorable! I was at work yesterday when I read this post, and I totally busted out some notebook paper and folded one at my desk. I think I'm going to cuddle up on the couch with a Lifetime Christmas movie and make a strand of these 🙂