This beautiful DIY Tassel Necklace is simple to make and sure to collect complements every time you wear it!

DIY Tassel Necklace
Have you ever seen a piece of jewelry and become obsessed with having it? I'm not talking diamonds, but this beautiful bracelet with tassels.
The bracelet is made by Shashi, and when I looked at their website I found a bunch of other styles that I loved, too.
I wish I could stock up on necklaces, bracelets, and earrings, but unfortunately, my budget is really tight right now.
So what's a girl to do? I decided to try my hand at making a necklace inspired by that pretty bracelet ... and I'm so happy with how it turned out!
Lucky for you, I'm sharing a step-by-step tuturial. Don't be intimidated: it's really easy (I swear).

Necklace Supplies
Want to make your own necklace? Here's what you'll need:
- Embroidery Thread - You need 3 colors. I used DMC 832 (gold), 3808 (dark turquoise), and 718 (plum).
- Needle Nose and Flat Nosed Pliers - If you don't already have jewelry-making tools, a pliers kit is an affordable way to get started.
- Scissors
- Crimp covers (I used Beadalon 4 mm gold crimp covers.)
- Jewelry chain (For a similar look, use a chain with small rings. Mine's from Bead Landing, and I got it at Michaels.)
- Ruler
- Sewing needle, not pictured (The eye must be small enough to pass through a chain loop.)

How to Make a Tassel Necklace
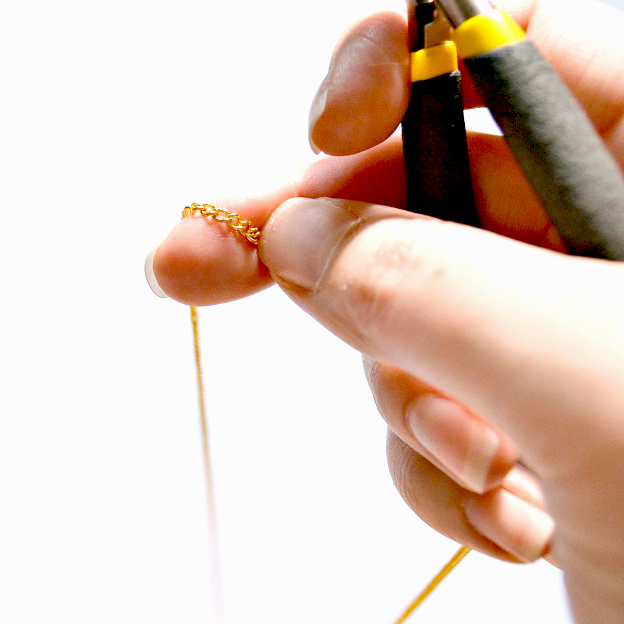
The first thing you need to do is measure a 30-inch piece of chain. Once you've measured the chain, use your pliers to open a jump ring at the 30-inch point, then separate from the rest of the chain.
Slip the loop from the opposite end of your 30-inch chain onto the open jump ring, and then use your pliers to close the loop. You should now have a closed chain necklace that can be slipped over your head.
For an explanation of jump rings, check out this tutorial on opening and closing jump rings.
Making the Tassels
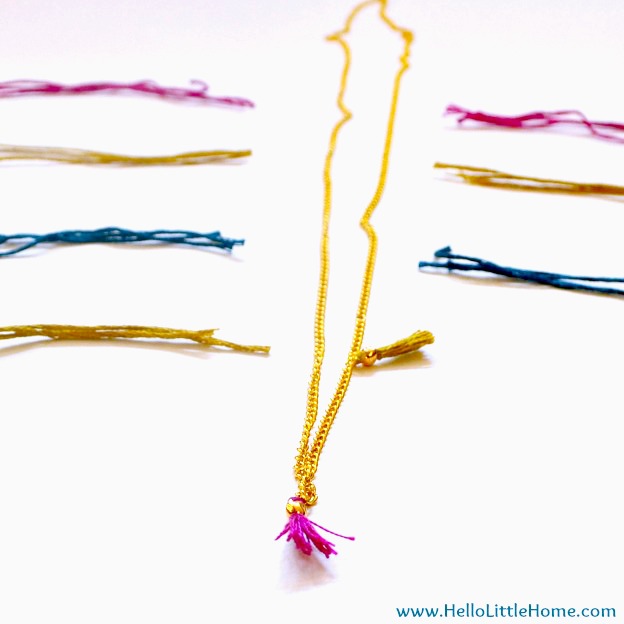
Next, you need to cut your floss. You can use whatever colors you want, but for this example, let's say you are using magenta, blue, and gold like I did. For each tassel, you will need 3 4-inch strands of floss.
Since the necklace has 2 blue tassels, 3 magenta tassels, and 4 gold tassels, you will need to cut:
- 6 4-inch blue strands
- 9 4-inch magenta strands
- 12 4-inch gold strands
You are now ready to make your first tassel. This tassel will be the center of your necklace.
- Take three strands of the magenta floss and thread it on your needle, as shown below. (Note: each strand of floss is made of a bunch of individual strands. Don't worry if one or two of the individual strands does not make it through the needle.)
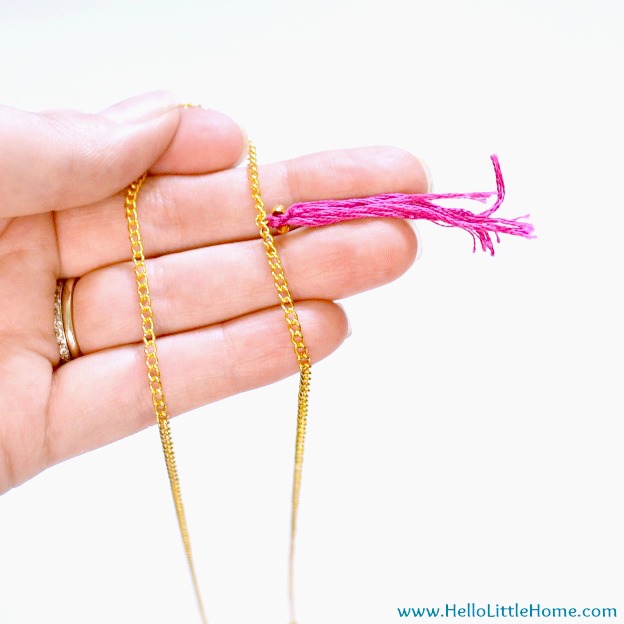
- Pull the needle through the center of one of the jump rings on your chain. This can be somewhat tight. Just gently pull on the chain as you wiggle the needle through.
- Once the eye of the needle makes it through the jump ring, pull one half of the floss completely through the ring (see lower left image below).
- To attach the tassel to the chain, make an overhand knot. Pull it tight, and then make another overhand knot, pulling it tight, as well. Don't worry if ends of your tassel are ragged or uneven.

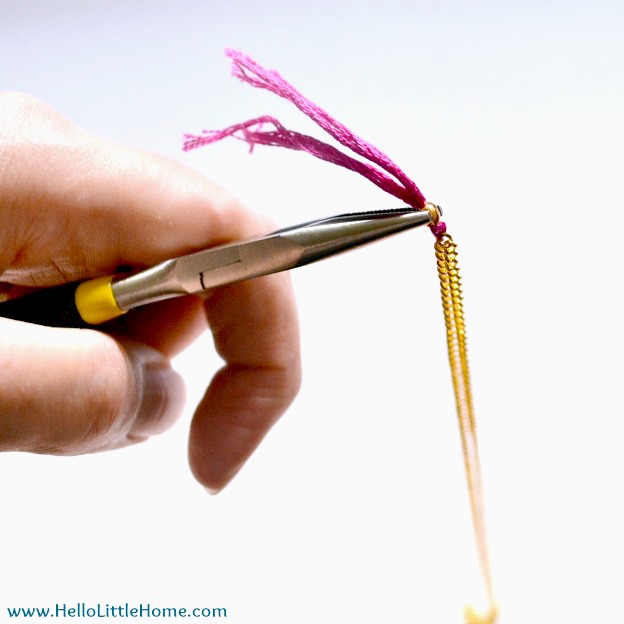
Place a crimp cover over the knot, as shown below.
Using the flat nose pliers, pinch the crimp cover closed tightly, covering the knot as you do so.
Next, you need to trim the tassel. Measuring from the crimp cover, trim the floss so the tassel measures ½ inch long. Voila - tassel complete!

Add the remaining tassels in the same manner, spacing them 2 inches apart, as seen below.

Before adding the remaining tassels, it's a good idea to lay out your floss. This will help ensure that you place the tassels in the correct order.
Finish adding the remaining tassels, and your necklace is complete! Isn't it pretty?


Have you ever made your own jewelry?

Lovely necklace! I love the thread colors you used! Thanks for sharing great tutorial!
Have a wonderful week!
Hugs from Portugal,
Ana Love Craft
I'm so glad you like it, Ana! Let me know if you make one:)
This is really cute! And looks easy enough that I can make it with my grand daughter. Of course, I had to "like" and pin it! Just popping over from Pin It Thursday. I would be honored if you would visit my site. I will look forward to your comments. Deb @ Kneaded Creations
Hi Deb! Thanks for checking out my blog and necklace tutorial. Let me know if you try it! I'll be sure to check your site, too:)