Add a little personality to your tree with these unique DIY vintage Christmas ornaments ... they're so fun and easy to make!

This DIY vintage Christmas ornaments tutorial has been a long time coming!
Years ago, before Hello Little Home even existed, I found some empty tins at a junk store. I used them to make a few retro-style shadow box ornaments, and I absolutely love them. Each one is unique, and I've used these cute old fashioned ornaments to decorate my tree every Christmas since.
These ornaments are so fun to make, and I've been meaning to share a tutorial ever since I started my blog (ahem ... almost five years ago).
Well, I finally got my act together just in time for the holidays!

DIY Vintage Christmas Ornament
If you enjoy making homemade Christmas decorations as much as I do, then you are going to want to make tons of these cute DIY vintage Christmas ornaments.
These ornaments are just so fun to make. Once you put together one, you'll want to create more!
The best things about these easy to make Christmas ornaments is that you can get totally creative with them. There really is no right or wrong way, and depending on what clip art you use, each ornament will look totally unique.
This is one of those holiday crafts that has no limits, so pull out your stash and start creating!

How to Make Homemade Christmas Ornaments
Want to make your own DIY shadow box ornaments? Here's what you'll need:
- clip art (Look in catalogs and magazines for unique images and patterns, or search online for free holiday clip art. The Graphics Fairy is a great resource for vintage-style clip art.)
- scissors
- 4-inch round tins (you can use the lid and the base)
- Mod Podge
- foam craft brush
- hot glue gun
- decorative papers
- foam mounting squares
- letter stickers
- faux snow
- pipe cleaners
- glitter
- Other crafty items, like: washi tape; ribbon; faux greenery, berries, and mini pine cones; sequins, etc.
You'll want to start by finding a piece of clip art you'd like to use, then choosing a few other items to go along with it. Work on the layout next.
Play around with placement of the different items, keeping in mind that you want to add dimension and layers. There should also be some contrast between colors and textures in the different pieces of your ornament.
Make sure everything fits in your tin, too, of course!

The next step is to decorate the tin itself, since everything else you're using will be placed on top of it.
For this ornament, I brushed Mod Podge around the inside rim of the tin, as well as the top edge.
Then, I covered it with glitter.

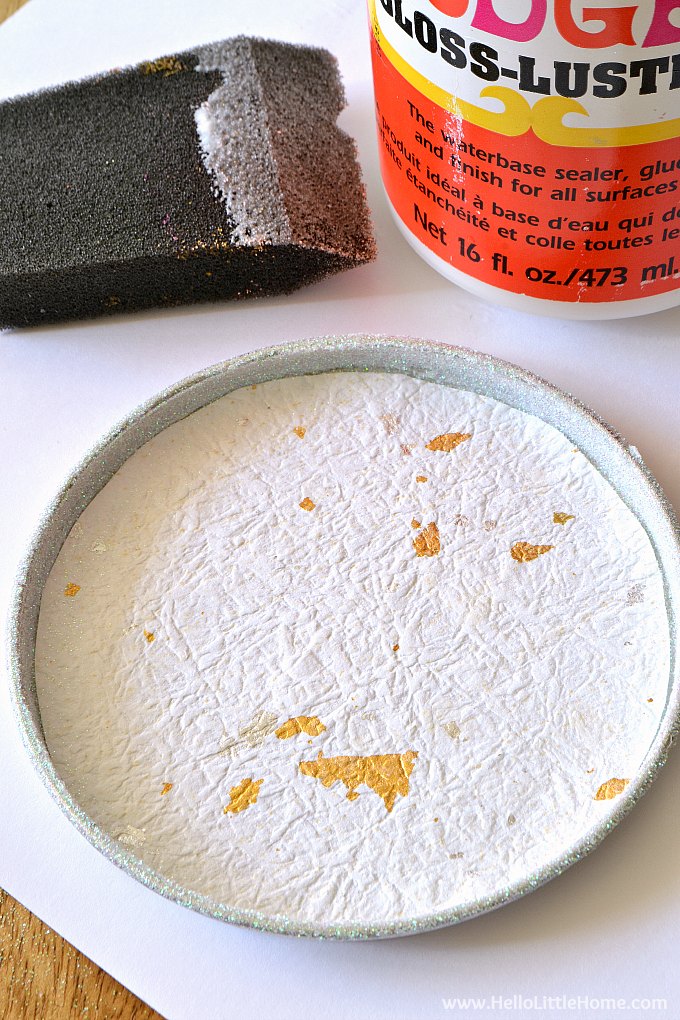
Next, you'll want to cover the back of the tin with paper. This is the perfect way to use interesting scrapbook paper or even origami paper.
Trace around the tin, then cut out the circle, trimming it to fit as needed. Then, cover the back of the paper with Mod Podge and adhere it to the inside of the tin.
I used a pretty gold-flecked origami paper. The crinkle texture and gold and silver flecks looks so pretty in the background of my homemade Christmas ornament.
Once your background is in place, you can add the other elements of your shadow box ornaments.
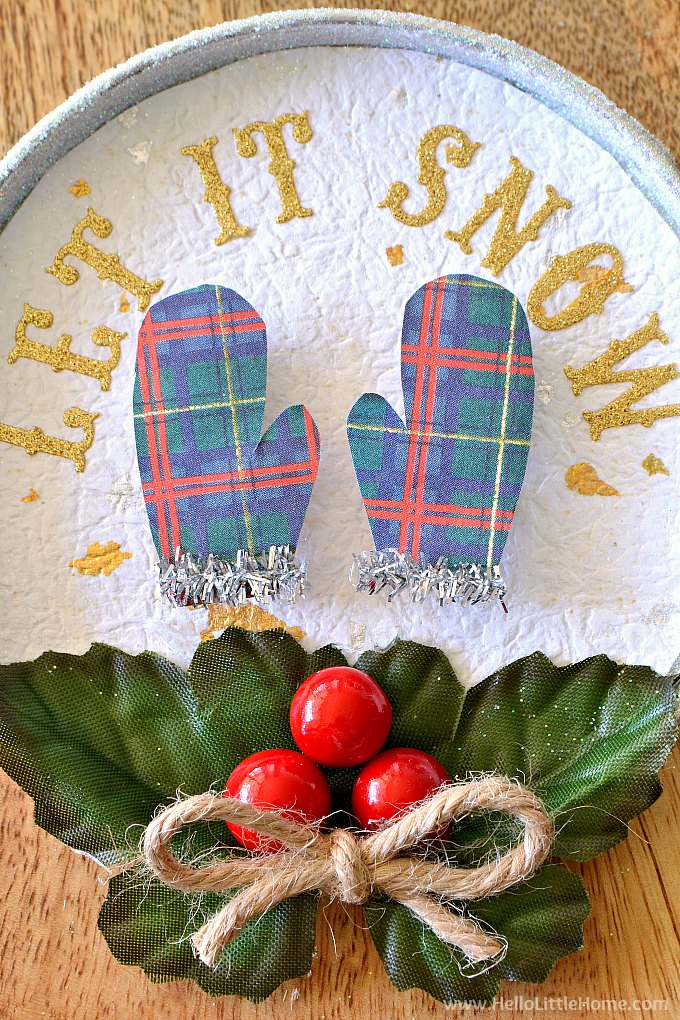
Keep in mind that you're adding things in layers, so you want to start with the bottom layer first. For this ornament, I added a "LET IT SNOW" message using gold letter stickers first.
To make the mittens, I cut out a mitten shape from some plaid paper I found in a Paper Source catalog. Magazines are also a great source for cool paper or images. And you can search for vintage clip art online, too ... The Graphics Fairy is an awesome resource!
After cutting out the mittens, I hot glued a silver pipe cleaner to the bottom for a little sparkle. Then, I attached the mittens together with a piece of string.
Finally, I attached the mittens to the tin with foam mounting squares (I stacked the squares two high for extra height). I love these mounting stickers. They're are perfect for adding height to your projects. Aren't those mittens cute?

To finish my DIY Christmas ornament, I hot glued a couple leaves, a few red berries, and a twine bow to the bottom of the tin.
You may notice that I ended up trimming off the string connecting the mittens. It was so cute, but it just didn't fit once I added the leaves.
As you create your own homemade Christmas ornaments, you'll probably find yourself making similar edits as you go along ... all's well that ends well, right?
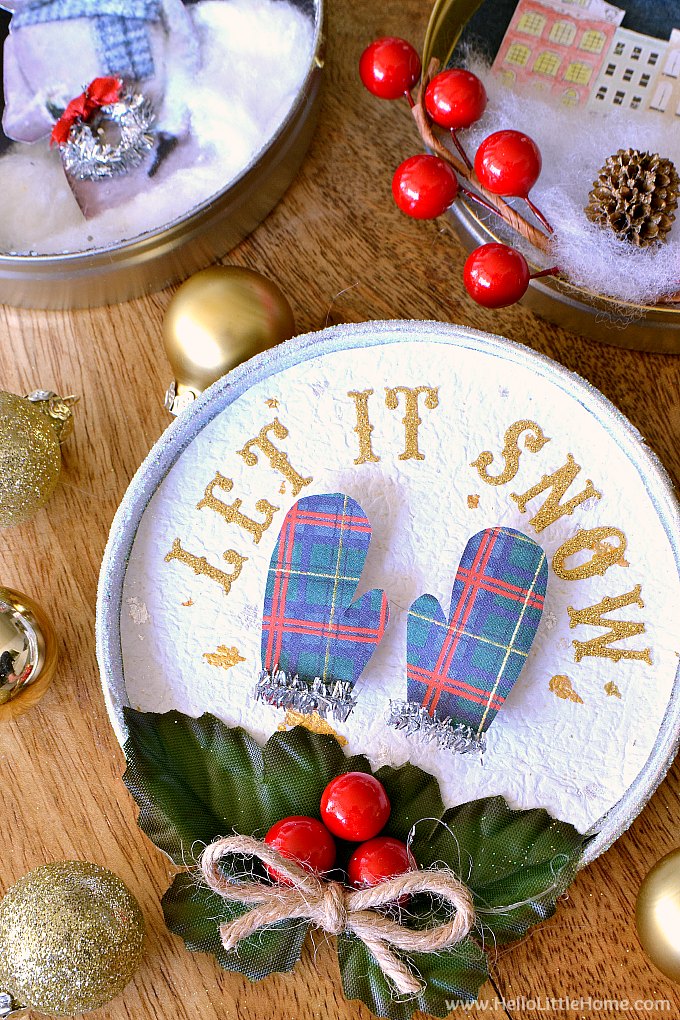
The final step is to hot glue a looped piece of twine or ribbon to the back of the tin for hanging the ornament on your tree.
Didn't it turn out cute?
Those mittens are just adorable!
For my other DIY shadow box ornament, I did things a little differently.
I started by painting the tin's inside rim with my favorite gold paint. Metal doesn't hold paint well, so I needed to add quite a few coats to get a subtle gold finish.
The buildings and Merry Christmas banner are from that same Paper Source catalog that I cut the mittens from. I attached them using foam mounting squares to give them a little height.
Then, I attached a little faux snow with hot glue. Lastly, I hot glued on some berry branches and a mini pine cone. Michaels is a great place to shop for faux greenery and berries.
I may go back and add a bow under the pine cone ... what do you think?

This snowman shadow box ornament is one that I made years ago. I still love him!
For this ornament, I applied silver glitter to the inside rim of the tin. The chunks of glitter really sparkle on the tree!
I'm not sure where I got the background at this point, but you could create something similar using navy blue paper. Then, I attached some silver shapes I had in my stash and topped them with blue sequins.
For this ornament, I used cotton balls for the snow. If you do the same, just make sure to pull the balls apart a bit before you hot glue them. That way they'll look more natural.
The last step was adding that adorable snowman clip art. And for even more pop, I added a mini wreath that I made from a pipe cleaner and small piece of ribbon. So cute, right?

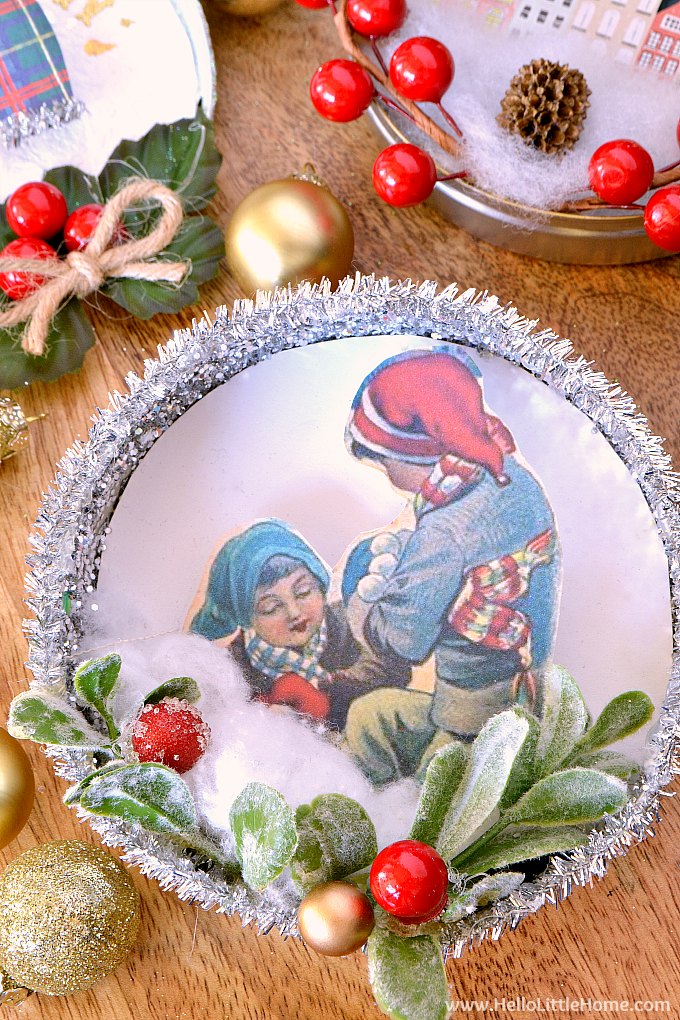
The sweet old fashioned ornament below was another one I made years ago.
For this ornament, I coated the inner rim with glitter and backed the tin with a piece of white paper.
I attached the clip art using mounting square for dimension, then I added cotton balls for a little snow.
For the finishing touches, I hot glued on the holly branches, as well as a silver pipe cleaner around the rim.
And here's one more DIY vintage Christmas ornament I made in the past ... they are addictive once you get started, I'm telling you!
Again, I added glitter on the inside rim, then glued a piece of craft paper to the back.
Next, the bell clip art was added with those same mounting stickers. To add extra interest to the bell, I added a little bow at the top and gold sequin on the dinger (is that what you call it?). I also attached a tiny Merry Christmas sign near the top of the bell.
Finally, I hot glued some holly inside the tin, as well as at the top. Isn't she sweet?

I hope you enjoyed this DIY vintage Christmas ornaments tutorial.
These adorable old fashioned ornaments are SO fun to make! You can do tons of creative and unique things with them ... your imagination is the only limit!
If you try this Christmas ornament tutorial, please let me know. I'd love to see how they turn out.
For more holiday inspiration, make sure to check out my DIY Cardboard Gingerbread Ornaments and all my Christmas recipes, crafts, and decor ideas, too!

Do you enjoy making your own ornaments, too?
Love your vintake ornaments so individual
Thank you so much, Mary! They are so fun to make. I'll hope you'll try it! 🙂
I made a jar lid ornament every year using a photo of our son from birth to about six years old. Wish I would've continued the tradition through the rest of his life..
That is such a good idea to use a jar lid, Shirley! You should go back and find pictures from the years you missed 🙂
Those are so cute!