• Skip to primary navigation
  • Skip to main content
  • Skip to primary sidebar
Hello Little Home
  • Recipes
    • Appetizers
    • Breads
    • Breakfast
    • Desserts
    • Drinks
    • Main Dishes
    • Salads
    • Sandwiches
    • Sauces + Condiments
    • Side Dishes
    • Soups
    • Kitchen Tips
  • Travel
  • Decor
  • DIY
  • Lifestyle
    • Beauty + Style
    • Blogging
    • Health + Fitness
    • Holidays
    • Party Ideas
  • Subscribe
  • About
menu icon
go to homepage
search icon
Homepage link
  • Recipes
  • Travel
  • Decor
  • DIY
  • Lifestyle
  • About
    • Email
    • Facebook
    • Instagram
    • Pinterest
  • ×
    Home » DIY » Easy DIY Chalkboard

    Easy DIY Chalkboard

    Published Aug 5, 2013 · Updated Jan 18, 2020 by Ginnie · 1 Comment

    Pin
    Share
    Email

    Make an easy DIY Chalkboard from any picture frame with this step-by-step tutorial!

    Easy DIY Chalkboard

    This post contains affiliate links.

    I have a really fun DIY project for you today - a DIY chalkboard.

    Perfect for keeping lists, posting a dinner menu, or even displaying a fun message, a chalkboard is a quick and easy way to get crafty.

    This chalkboard project is a great way to repurpose an outdated frame from the thrift store or to reuse one that's been collecting dust in a closet.
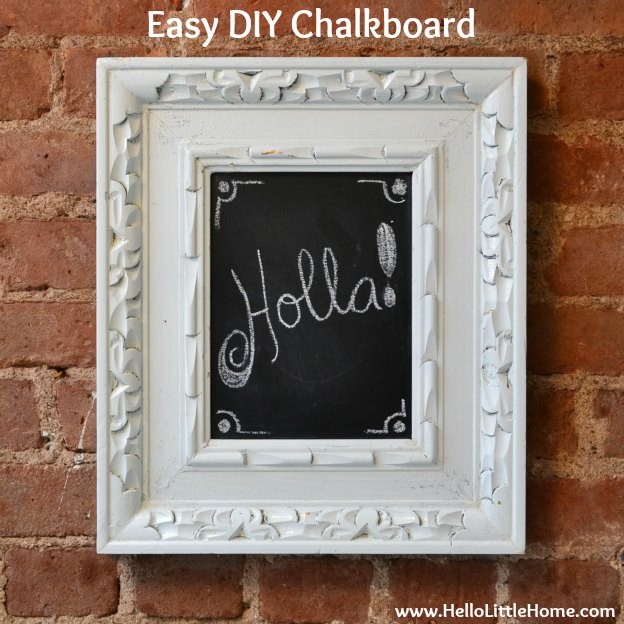
    Easy DIY Chalkboard

    Here's what you'll need:

    • a frame - I spray painted mine white before starting
    • a piece of cardboard or heavy card stock, cut to fit in the frame opening
    • chalkboard paint
    • a foam paint brush

    Easy DIY Chalkboard-step-by-step

    How to Make a Chalkboard from a Picture Frame

    This project is so easy that it hardly need directions.

    1. Gather your supplies and pour the chalkboard paint into a small container. I used a plastic cup.
    2. Using your brush, cover the cardboard or card stock with a thin layer of paint.
    3. Let the paint dry, and then add another coat of paint. Make sure to rinse out your brush in between coats, otherwise it will get stiff.
    4. Add additional coats of paint until the cardboard is completely and evenly covered. I ended up applying 4 coats of paint, which sounds like a lot, but the paint dries quickly.
    5. After all coats of the chalkboard paint have been applied and have dried, attach the cardboard/card stock to the frame. You can either use the existing hardware or staple it in place with a staple gun (that's what I did).

    Easy DIY Chalkboard

    Now comes the fun part: decorating your chalkboard!

    Decorating a Chalkboard

    The first thing I recommend is going over the chalkboard with the side of a piece of chalk.

    Completely cover the board and then wipe it off with a piece of paper towel. This will add a little dimension and character to your board.

    Then decorate to your hearts content. You can either use regular chalk or specially made chalkboard markers.

    Check out my DIY Thanksgiving Chalkboard Art for lots of tips on lettering and decorating ... it's easy than you'd think.

    Easy DIY Chalkboard: Finished Product

    Loved this DIY Chalkboard?

    If you like this project, check out some of my other chalkboard crafts, too:

    • DIY Mini Chalkboard Magnets
    • Cigar Box Chalkboard
    • Printable Holiday Chalkboard Gift Tags

    Easy DIY Chalkboard: Holla!

    Holla! I couldn't resist going with a tongue-in-cheek message.

    I hope you try this fun project!

    Pin
    Share
    Email
    « Get the Look: Summer Shorts Style
    Hello Friday! Link Roundup »

    About Ginnie

    Ginnie is the writer, photographer, and chief content creator behind Hello Little Home. She loves trying new things (whether that’s creating delicious vegetarian recipes, exploring a new city, trying a fun DIY project, or sharing a pretty makeup look), and she hopes to inspire you to do the same! Read more about Ginnie here.

    Subscribe
    Notify of
    Recipe Rating


    Recipe Rating


    This site uses Akismet to reduce spam. Learn how your comment data is processed.

    1 Comment
    Inline Feedbacks
    View all comments
    Jana
    11 years ago

    That's adorable!

    0
    Reply

    Primary Sidebar

    Ginnie Headshot

    Hi, I'm Ginnie! Welcome to Hello Little Home, which is all about inspiring everyday creativity! I'm excited to share my favorite things with you ... vegetarian recipes, travel inspiration, DIY projects, decor ideas, beauty and fashion tips, and more! Read more about me here!

    FOLLOW ALONG

    • Email
    • Facebook
    • Instagram
    • Pinterest
    • YouTube

    Newsletter

    Keep up with all things Hello Little Home ... sign up below to receive my weekly newsletter!

    You'll get all my posts delivered straight to your inbox, plus exclusive content just for subscribers.

    Footer

    ↑ back to top

    Featured By

    A graphic with logos from media outlets Hello Little Home has been featured by, including Martha Stewart, Home Depot, Good Housekeeping, House Beautiful, Parade, HGTV, BuzzFeed, and more..

    Information

    • Contact
    • Privacy Policy
    • Disclosure Policy
    • Terms & Conditions
    • Web Stories

    Newsletter

    Never miss a post ... Sign Up for our weekly newsletter

    Connect

    • Facebook Icon
    • Pinterest Icon
    • Instagram Icon
    • Twitter Icon
    • YouTube Icon
    • RSS Feed

    Copyright © 2022 Hello Little Home

    wpDiscuz