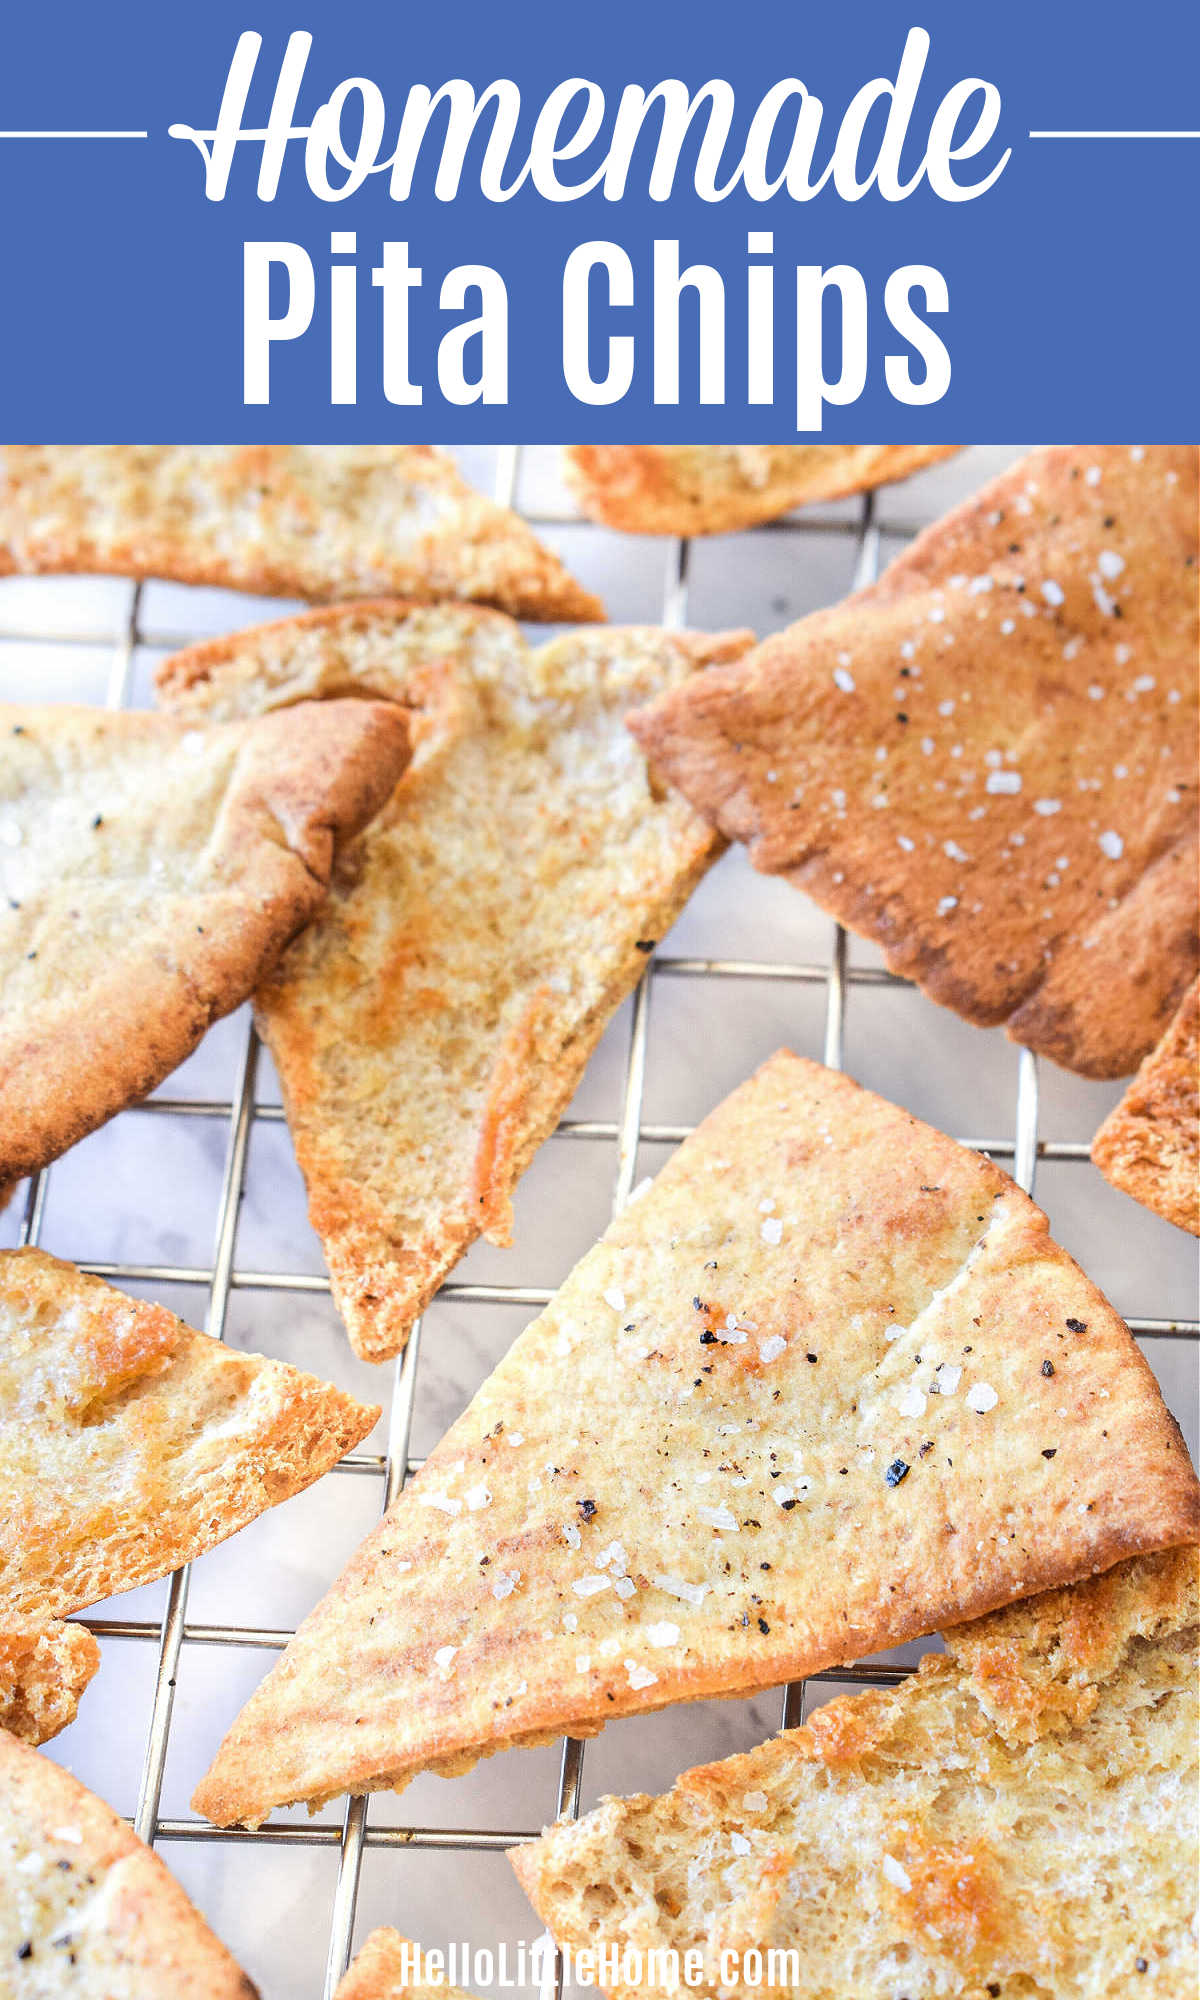
Learn how to make the BEST homemade Pita Chips from scratch! These crunchy, crave-worthy chips are super delicious, healthy, and so quick and easy to make. Pair them with your fave hummus or dip for a tasty snack!

This post contains affiliate links. As an Amazon Associate I earn from qualifying purchases.
Ginnie's Take
For as long as I can remember, hummus has been one of my favorite snacks. And there's nothing that pairs better with this classic dip than veggies and homemade Pita Chips! If you've never made your own chips before, you're going to love this simple recipe! These yummy chips are crunchy, packed with flavor, and the perfect partner for almost any dip. They're a great cracker alternative.
Why You'll Love This Recipe
You can purchase these yummy crisps at any store, so why DIY, when you can buy?
- Quick + Easy to Make - These yummy chips are so fun and simple to make that you can prepare a batch whenever a craving strikes!
- Simple, Healthy Ingredients - Store bought chips are often fried, and these chips are baked. Plus, you'll know exactly what is in them. No mystery ingredients or unnecessary preservatives!
- Customizable - You can season the chips however you want.
- No Waste Recipe - These chips are a great way to use up stale or leftover pita bread.
Jump to:
Ingredients
The ingredients for these baked chips are simple and straightforward! They're made from:
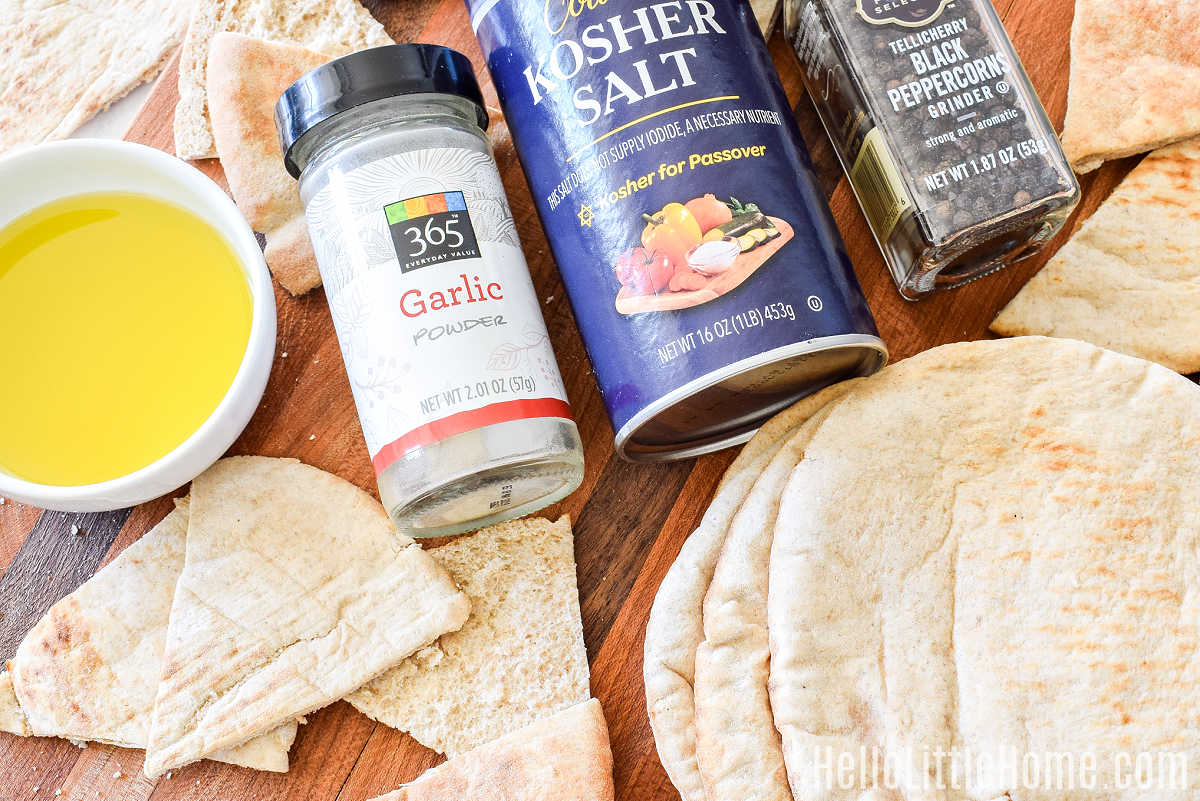
- Pita Bread - The star ingredient! You can make this recipe with regular white or whole wheat pita bread (I used whole wheat). Look for it in the deli, bakery, or bread section of your grocery store. If you have a Middle Eastern or Mediterranean market in your area, head there the best quality bread.
- Olive Oil - Extra virgin olive oil imparts a delicious, authentic flavor to your chips, while also making them crisp.
- Seasonings - The best part of making Pita Chips from scratch? You get to season them exactly how you want! I used a classic combo of garlic, salt, and pepper, but you'll find tons of creative ideas below.
These chips are naturally vegetarian, vegan, dairy free, and nut free!
You'll Also Need
To prepare the chips, you'll need a serrated knife, as well as a pastry brush (a silicon pastry brush is so much easier to keep clean than a traditional brush). A pizza cutter is optional. You'll also need a couple baking sheets (these Circulon pans are my fave) and a wire baking rack.
How to Make Pita Chips
It really couldn't be easier to make these tasty chips at home! You'll find a detailed, printable recipe at the end of the article, but here's a quick overview of the steps:
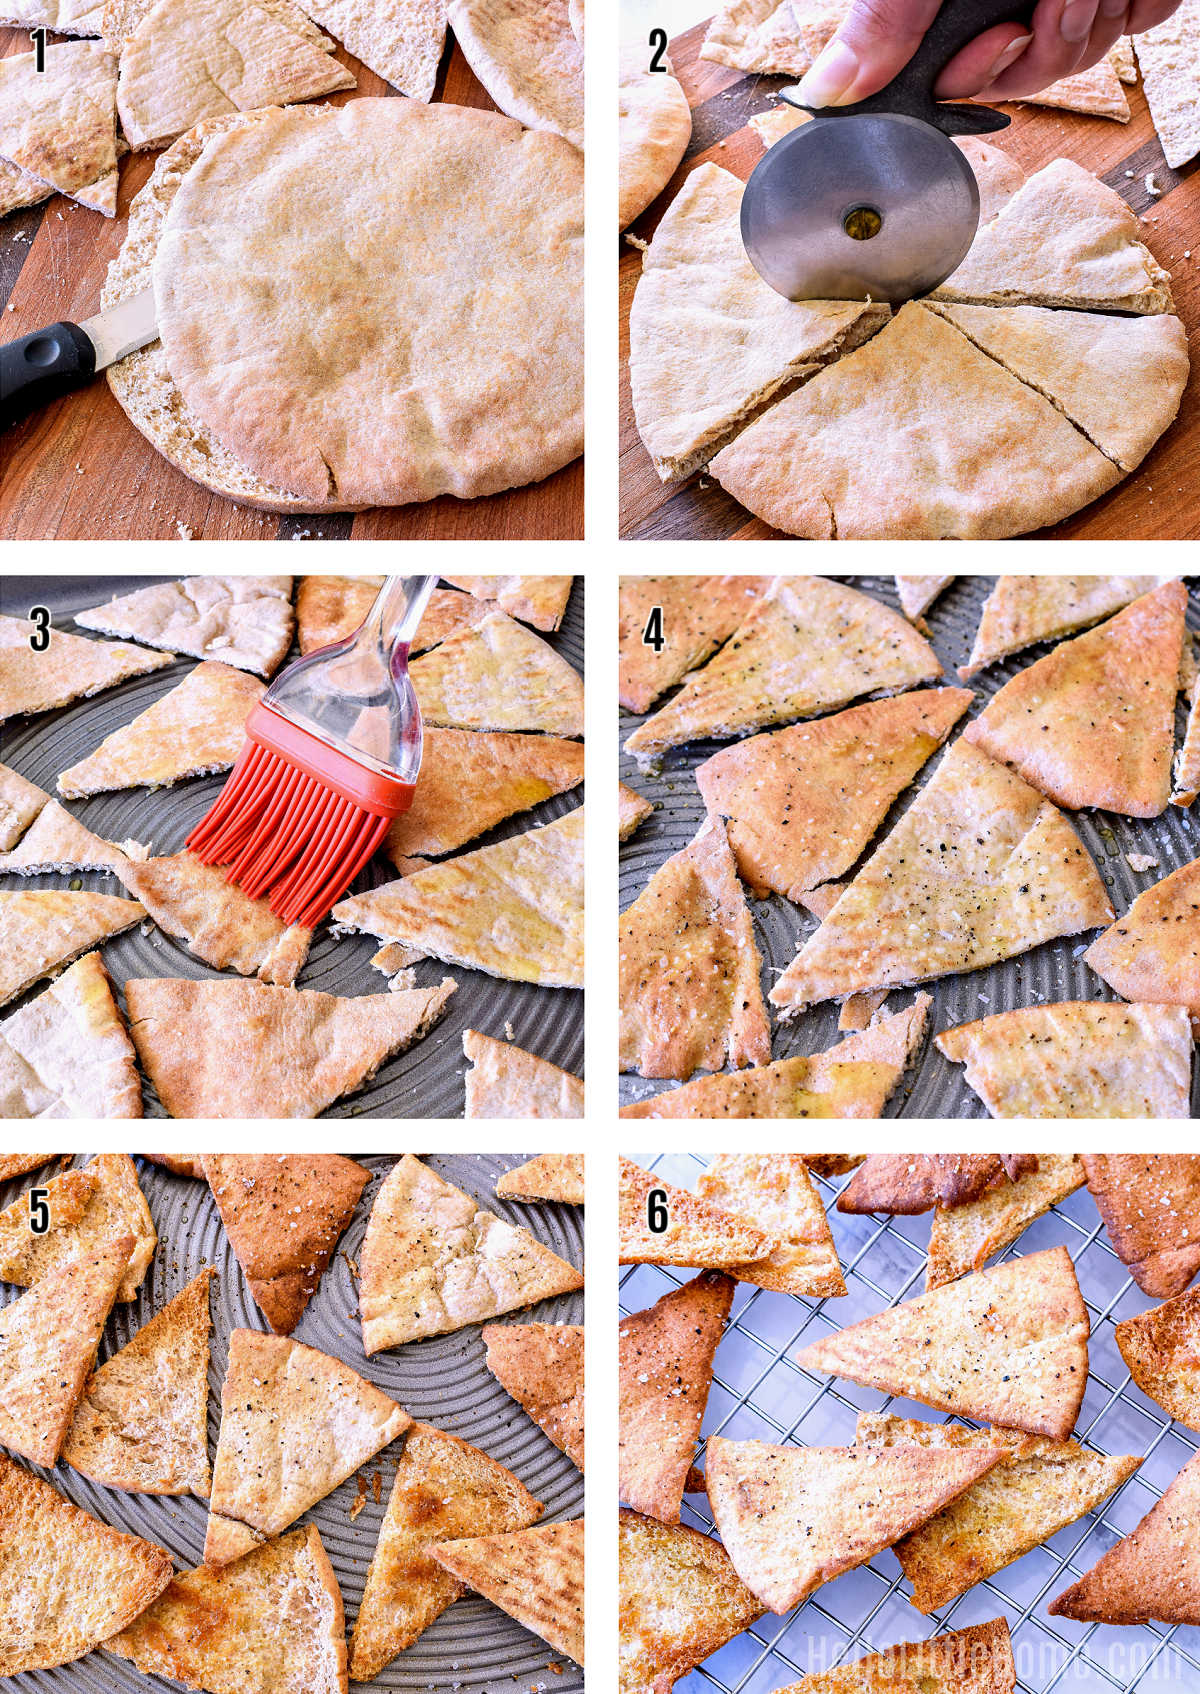
- Separate the pita bread. Use a serrated knife to carefully separate each pita into two single-layer rounds. If you're using pocketless pita, you can skip this step.
- Cut the chips. Using a pizza cutter or serrated knife, cut each round into eight wedges. If your pita is especially large, cut it into rectangles instead of wedges (you'll also end up with more chips).
- Brush with olive oil. Place the pita wedges on a baking sheet in a single layer (do not overlap), then brush them lightly with olive oil. Flip them over, and brush the other side with oil, too. Tip: you can also brush the bread with oil before you cut it into wedges, if you want to save a little time.
- Add seasoning. Sprinkle the wedges with your choice of seasoning (you only need to do one side). I used a combo of garlic powder, salt, and pepper, but you find lots of ideas below.
- Bake. Cook your pita for five minutes, then flip and bake for another 2 to 3 minutes (or until it's browned and crisp). Make sure to keep a close eye on the chips, so they don't burn! If you're using thicker bread, this may take longer.
- Cool. When the chips is done cooking, cool them on the pan or transfer them to a wire baking rack. As they cool, they will get crunchier.
And that's all there is to it. Easy, right? Your homemade Pita Chips will be ready for dipping in just a few minutes!
Seasoning Ideas
There are many mouthwatering ways to season toasted pita bread. I used a combination of garlic powder (onion powder works, too), salt, and pepper, which was delish! Here are some other seasoning ideas:
- Salt and Pepper - Super simple, super tasty! Make sure to use fresh cracked pepper, and I'd also recommend Kosher Salt, which has larger, tastier granules than standard table salt (I use it in all my recipes). You really can taste a difference.
- Cinnamon Sugar - Sprinkle your chips lightly with cinnamon and sugar before baking.
- Garlic and Herb - Add your favorite dried herbs (like basil, oregano, rosemary, etc.) to your chips along with garlic powder.
- Spice Blends - Not sure what herbs and spices work together? Use your favorite spices blends, such as Cajun, Curry or Garam Masala, Herbes de Provence, Adobo Seasoning, Pumpkin Pie Spice, or Old Bay Seasoning.
- Parmesan - After flipping your chips, sprinkle them with grated Parmesan cheese before returning them to the oven. Parmesan tastes great in addition to garlic, herbs, etc., so have fun experimenting with flavors.
- Cheddar - Sprinkle your chips with a touch of finely grated cheddar after flipping them. A sharp, aged, crumbly cheddar will work best.
- Spicy - Cover your chips with cumin, chili powder, garlic, and cayenne or crushed red pepper flakes.
- Everything Bagel - Top your chips with Everything Bagel Seasoning, a delicious blend of sea salt, garlic, onion, sesame seeds, black sesame seeds, and poppy seeds.
- Truffle - Instead of regular salt, season your pita with truffle salt for a gourmet twist that's totally irresistible!

How to Store
If you're not planning on eating these oven baked Pita Chips right away, let them cool, then store them in an airtight container or zip top bag. They're crispiest when eaten within a few days, but they'll keep for couple weeks.
What to Eat with Pita Chips
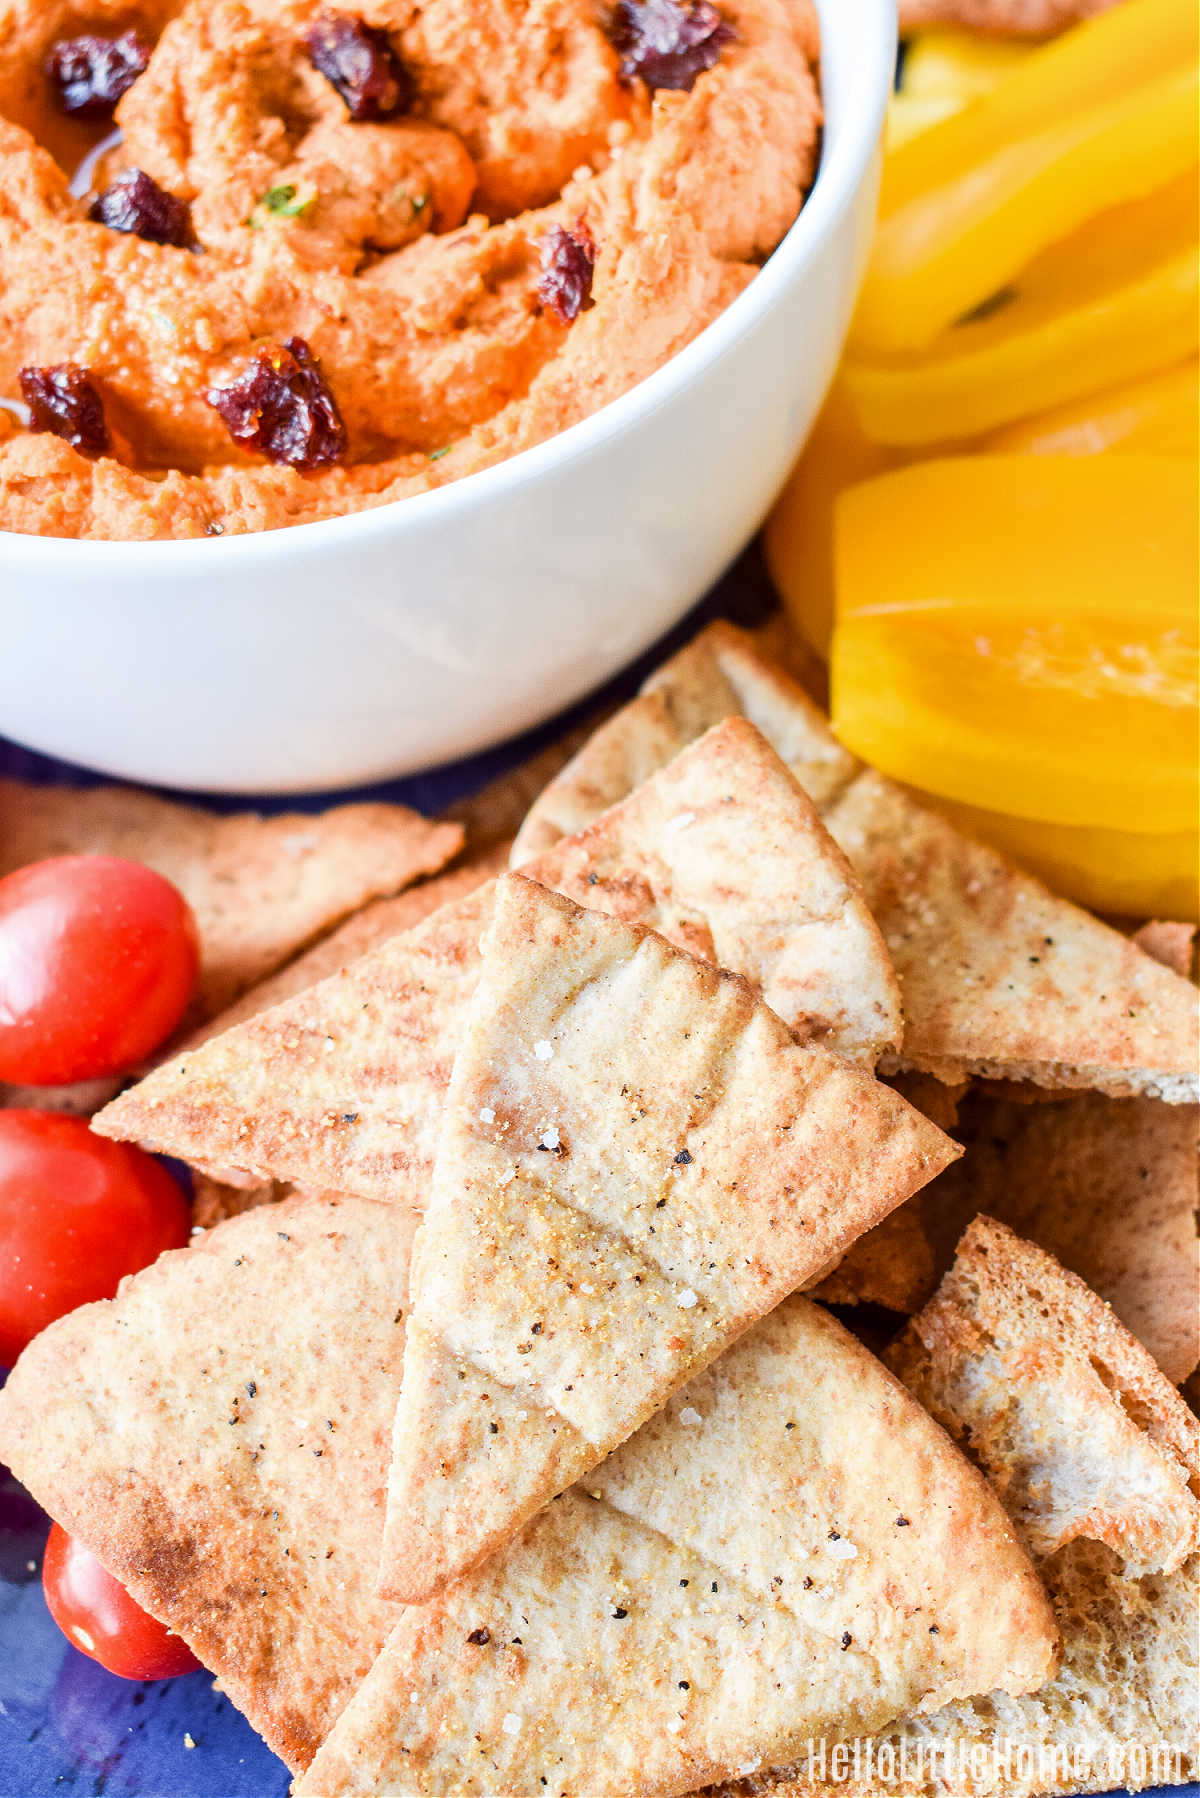
Wondering what to eat with your homemade chips? You can certainly enjoy them on their own, but personally, I love the classic combo of Pita Chips and Hummus! They're truly one of the best things to eat with hummus! Just add a few veggies, and you have a delightful snack, appetizer, or light meal that's a total crowd pleaser. Here are a few recipes you'll love:
- Homemade Hummus - start here for the BEST, most authentic recipe + tons of hummus-making tips!
- Black Bean Hummus
- Sun Dried Tomato Hummus
- Layered Greek Hummus Dip
- Pumpkin Hummus
- Roasted Red Pepper Hummus
- Olive Hummus
- Southwest Hummus
- Roasted Garlic Hummus
- Chipotle Hummus
Don't stop there though. You can serve these crispy chips with almost any dip or spread. They're a great alternative to crackers! Try them with my Herb Cream Cheese Dip, Baked Feta Dip, Caramelized Onion Dip, Edamame Dip, or Mexican Spinach Dip, too. You can even crumble them up and toss in a salad or sprinkle them over soup.
Frequently Asked Questions (FAQs)
Homemade pita chips are a healthier alternative to fried, store bought chips (like potato and tortilla chips). They're baked (not fried), and you can control the amount of oil and salt that is used. As with most snacks, they are best enjoyed within moderation.
Traditional pita bread is not gluten-free, so neither are most pita chips. However, you can definitely make this recipe with a gluten-free pita bread like BFree if you prefer.


Pita Chips
Ingredients
- 1 package pita bread (Six 5 to 6-inch loaves with pockets)
- 3 tablespoons extra virgin olive oil
- garlic or onion powder (optional)
- kosher salt
- pepper
Equipment
Instructions
- Preheat oven to 425°F (220°C).
- Use a serrated knife to split each pita loaf into 2 halves, to make 2 single-layer rounds. (If you're using pocket-less pita, skip this step.)
- Cut each pita round into 8 wedges. Place wedges in a single layer on a baking sheet (you will need more than one baking sheet).
- Brush both sides of the pita wedges with olive oil. Then sprinkle lightly with garlic or onion powder, salt, and pepper.
- Bake pita wedges for 5 minutes. Flip, then bake for another 2 to 3 minutes, or until lightly browned and crunchy.
- Cool pita chips on a baking rack, then store in an airtight container until ready to eat. Enjoy!
Notes
Nutrition