Learn how to make the BEST Roasted Garlic Hummus. This recipe is so easy to make and couldn't be more delicious. It's the perfect healthy snack for garlic lovers!
This post contains affiliate links. As an Amazon Associate I earn from qualifying purchases.
Are you as obsessed with garlic as I am? Growing up, I can't remember my mom ever using fresh garlic, although she did use garlic powder. So I didn't really start using the good stuff until I began cooking on my own during college.
I've been making up for lost (garlic) time ever since. I just love it, and whenever a recipe includes for garlic, I pretty much always double to amount called for. Fresh breath be damned!
Which brings us to the amazing dip ... if you're as much of a garlic aficionado as I am, then you're going to LOVE this homemade Garlic Hummus! It's amazingly flavorful, super creamy, and so simple to make!
Ready to try it for yourself? You'll find all the garlicky details below!
Jump to:

Ingredients
This yummy chickpea dip uses really basic ingredients that you can find at almost any grocery store! Here's what you'll need:
- Chickpeas - Canned chickpeas (aka garbanzo beans) form the base of this creamy dip. If you prefer, you can cook them from scratch.
- Tahini - This sesame seed paste gives the dip its authentic flavor, so don't skip it. Find it in your grocery store's international aisle or near the nut butters. If your grocery store doesn't carry tahini, check your local Middle Eastern / Mediterranean market or buy it online. Joyva and 365 are two of my favorite brands that are relatively easy to find. Tahini has a tendency to separate, so make sure to stir it really well before using.
- Fresh Garlic + Roasted Garlic - This recipe uses a combination of fresh and homemade roasted garlic. The fresh garlic gives the dip a little bite, while the roasted provides an amazing, deep taste that wouldn't be possible with fresh garlic alone.
- Lemon Juice - Fresh lemon juice is also a necessity here. Avoid the bottled stuff, because you can really taste the difference.
- Salt - I recommend using Kosher salt.
This creamy Garlic Lover's Hummus is naturally vegetarian, vegan, dairy free, nut free, and gluten-free, so everyone at your table can enjoy it!
Roasted garlic is made by drizzling fresh garlic with olive oil and salt, then baking it. As it roasts, the garlic caramelizes, becoming softer and mellower. It still tastes like garlic, but the flavor is milder, sweeter, and missing the bite of fresh garlic.
You'll Also Need
To prepare this dip, you'll also need a food processor (or a high power blender), along with a good spatula is super helpful.

How to Make Roasted Garlic Hummus
This recipe is super simple to make! You'll find a detailed, printable recipe at the end of this post, but here's a quick overview of the steps:
- Roast the garlic. Remove the papery skin from the head, then trim off the top (exposing the cloves). Once you've done that, drizzle it with olive oil and sprinkle with salt, wrap with foil (or use a garlic roaster), and roast until tender.
- Mince garlic. When you're done roasting, pulse one fresh garlic clove in your food processor until minced.
- Add remaining ingredients. Scrape down the sides of the processor, then add the remaining ingredients: chickpeas, tahini, lemon juice, roasted garlic (squeeze it out of its skin), and salt (to taste).
- Purée. Blend everything together for at least three minutes, or until it's totally smooth. Stop and scrape down the bowl a time or two, as you blend.
- Season to taste. Add additional salt and / or lemon juice, if needed.
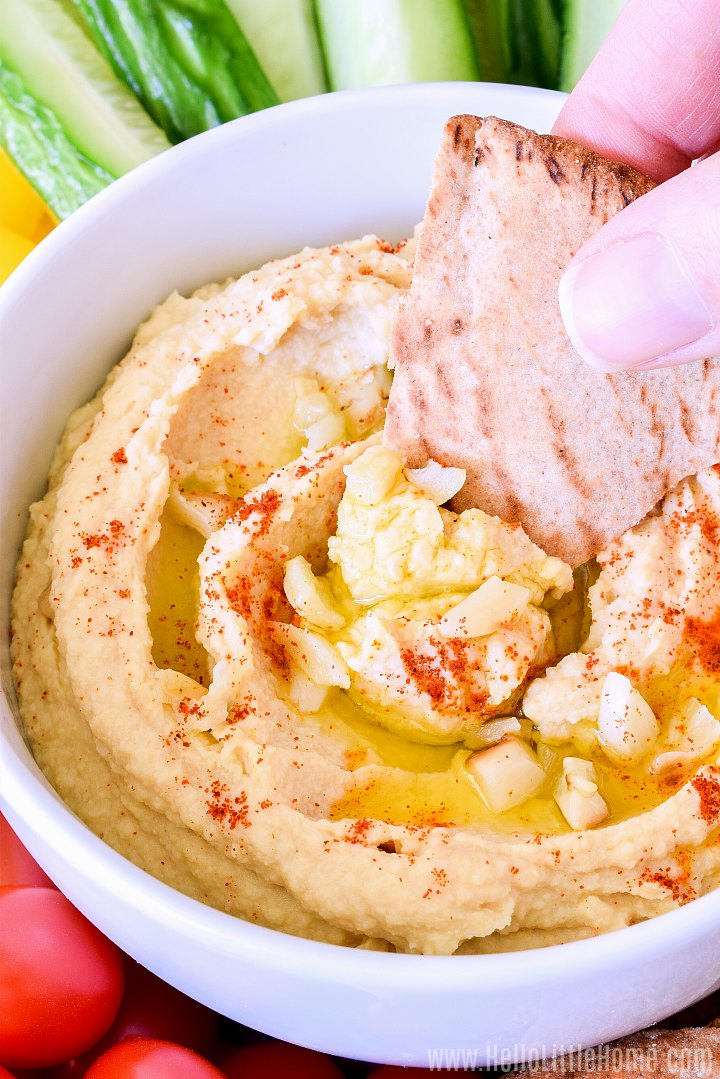
And that's all there is to it ... your amazing homemade Roasted Garlic Hummus is ready to eat! Serve it topped with olive oil, a dash of smoked paprika, and a chopped roasted garlic clove. Yum!


Recipe Tips
This recipe is impossible to screw up, but here are some tips that will make it taste even better!
- Stopping occasionally to scrape down your processor / blender with a spatula will ensure that everything gets well mixed.
- The longer you blend the ingredients, the smoother and creamier the dip will be. Plus, the spinning blades will incorporate a little air, making the end result lighter, too.
- If your dip is too thick or won't blend, add extra aquafaba (the liquid from the canned chickpeas) or cold water a tablespoon at a time. Then keep blending until you reach your desired consistency.
- Good seasoning is essential. Always taste before serving and add more salt and lemon juice, if needed. The amount of salt you'll need depends on your taste buds, as well as other factors (such as whether or not your beans were canned with salt).
Variations
Now that you've mastered this basic recipe, have fun experimenting a little. Here are some easy ideas!
- For hummus with less "bite", skip the clove of fresh garlic.
- To make hummus spicy, add ¼ teaspoon cayenne.
- For hummus with chunks of roasted garlic, chop up one of the heads after roasting, then set it aside. Once all the other ingredients have been blended together, stir in reserved chopped garlic.

What to Serve with Hummus
You can serve this delicious dip almost anything, but here are some of my favorite ideas:
- Crackers - The crispy crunch of crackers is perfect with this smooth, creamy dip. This Garlic Hummus would be delish with my Herb Parmesan Crackers.
- Pita - Hummus and pita bread just goes together! I especially love this dip with my Homemade Pita Chips.
- Fresh Veggies - I almost never serve hummus without fresh veggies. This time, I used cucumber, yellow and orange peppers, and grape tomatoes, but almost any vegetable works.
You can also use it in a bowl or sandwich. Try it in this Mediterranean Bowl, Roasted Veggie Bowl, Hummus Pizza, Veggie and Hummus on Pita Bread, or this Hummus Pesto Sandwich.
Storage
Store leftovers in an airtight container in your refrigerator, and it will stay fresh for three to four days. If you know you won't eat it in time, you can even freeze hummus!
Related Recipes
If you loved this easy dip, then try one of these hummus recipes next:
- Classic Hummus Recipe
- Sun Dried Tomato Hummus
- Southwest Hummus with Spicy Corn Relish
- Layered Greek Hummus Dip
- Pumpkin Hummus
- Roasted Red Pepper Hummus
- Easy Olive Hummus
- Spicy Chipotle Hummus
- Black Bean Hummus
Looking for more garlic recipes? Check out this Baked Ricotta Dip, these Garlic Mashed Potatoes, or my guide with 30 Ways to Use Roasted Garlic for tons of delicious tips!


Roasted Garlic Hummus
Ingredients
For Roasted Garlic:
- 2 heads garlic
- 2 teaspoons extra virgin olive oil
For Hummus:
- 1 clove garlic
- 1 (15 ounce / 425 gram) can chickpeas, drained and rinsed
- ¼ cup tahini
- ½ lemon, juiced
- kosher salt
Equipment
Instructions
Prepare Roasted Garlic:
- Preheat oven to 400°F (200°C).
- Remove excess papery skin from garlic head, keeping cloves intact. Use a sharp knife to slice ¼ to ½-inch from top of garlic head, exposing cloves.
- Place garlic on a piece of aluminum foil, then drizzle with olive oil and sprinkle with salt.
- Wrap foil around garlic, then roast garlic until cloves are soft and browned, about 40 to 50 minutes.
- Set aside until cool enough to handle, then squeeze garlic from skins.
Prepare Hummus:
- Pulse one fresh garlic clove in a food processor until minced.
- Add chickpeas, tahini, lemon juice, roasted garlic, and salt (to taste) to food processor. Blend for at least 3 minutes, or until totally smooth. Add a little cold water, as needed, to make blending easier or to reach desired consistency.
- Taste, then adjust seasoning to taste with more salt and / or lemon juice, if needed.
- Serve hummus with veggies and pita chips for dipping. Enjoy!
Video
Notes
Nutrition

