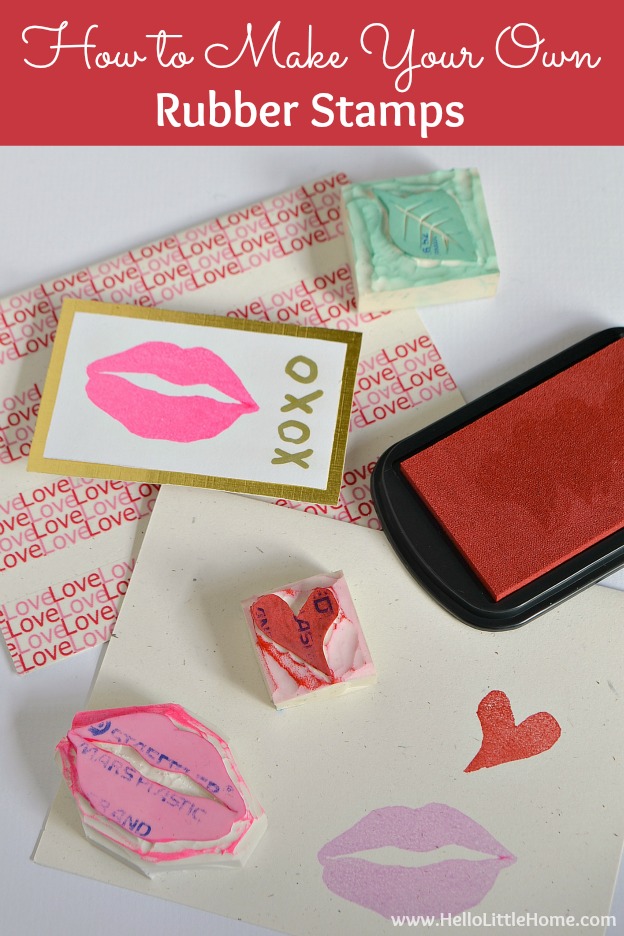
Learn how to make stamps at home ... it's so easy, super fun, and the perfect addition to your crafting arsenal!
This post contains affiliate links. As an Amazon Associate I earn from qualifying purchases.
If you enjoy crafting as much as I do, then chances are you love stamps!
Unfortunately, stamps are not cheap, and it's not like you can use the same stamp for every project. Know what I mean? Plus, sometimes it's hard to find just what you are looking for.
Which is why I love making my own carved rubber stamps! It really couldn't be easier, and it's super affordable, too.
Today is your lucky day. I'm going to show you how to make your own stamps at home from nothing more than a simple rubber eraser!
DIY Rubber Stamps
The best part about carving your own stamps is that you can customize them for your project.
No more searching for the perfect stamp ... make your own custom stamps instead!
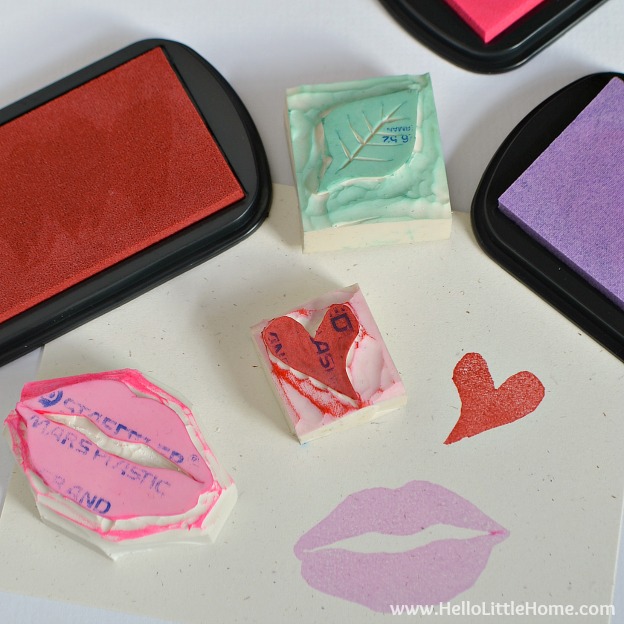
I've made leaves, snowflakes, hearts, and more. My latest stamp is a pair of lips that's perfect for decorating Valentine's Day Cards.

How to Make Stamps at Home
Want to learn how to make your own rubber stamp? Here's what you'll need:
- Staedtler Mars Plastic Eraser
- utility knife (an x-acto knife will work, too)
- soft pencil
- carving tool set, optional
These DIY rubber stamps are easy to make in just a few steps:
- Start by trimming your eraser down to size with the utility knife. It should be slightly larger than the stamp image will be.
- Draw your design on the eraser using the pencil.
- Trace around the design with the utility knife. Make sure to press the knife straight down into the eraser about ⅛ of an inch.
- Use the carving tools (or utility knife) to carve out the area around the stamp. Optional: if there is a lot of space around your image, trim the edges off the stamp, too.
- Test your stamp, then clean up any spots you missed.

Tips for Making Stamps at Home
Keep these things in mind when making your own stamps:
- Watch your fingers!
- You don't need carving tools, but it will make the job much easier. Try making a stamp or two, then consider investing in the tools. You can use these same tools for linocut and woodcut printmaking, which is also very fun.
- When carving words or letters, remember that you need to carve them in reverse order. I made an adorable LOVE stamp, only to stamp it and find out that the letters were backward. Learn from my mistake!
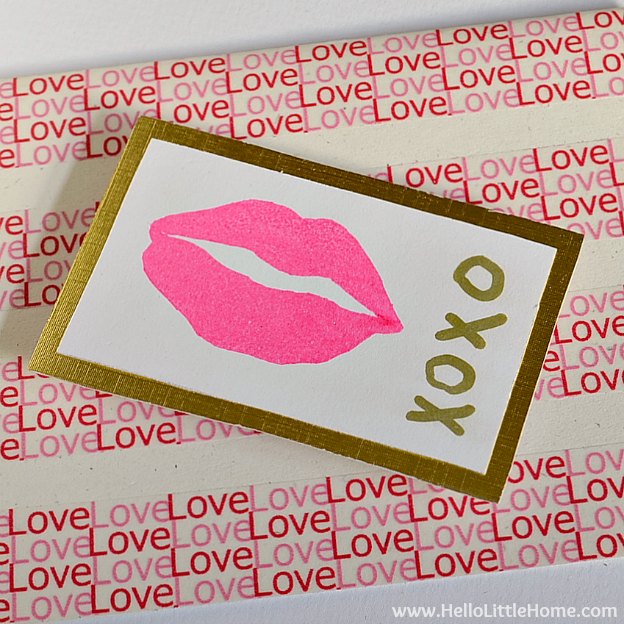
I absolutely adore how this lips stamp turned out and decided to use it to make a card.
Supplies for Making a Card with Homemade Stamps
To make this easy stamped Valentine's Day card you will need:
- cardstock
- blank card and envelope
- stamp and pink ink pad
- clear embossing powder
- heat embossing tool (20% off right now!)
- love washi tape
- scissors
- gold marker
- gold cardstock
- double-sided tape
- foam mounting squares
How to Make the Card
- Trim the card stock to size. It should be smaller than the folded card, because you will be mounting it on top.
- Press your stamp onto the ink pad, then stamp it on the cardstock.
- Cover the stamped image with clear embossing powder. Remove excess powder and return to the container. (Tip: instead of using clear powder, you could stamp the image with a clear VersaMark pad, then use pink embossing powder.)
- Heat the powder with the embossing tool to emboss the image.*
- Apply washi tape to the front of the card. Trim excess with the scissors.
- Use the gold marker to write your message on the stamped cardstock.
- Mount the stamped cardstock to the gold cardstock with double-sided tape. Trim the gold cardstock to size, if necessary.
- Add the stamped image to the card with the foam mounting squares.
*Watch my heat embossing video on YouTube if you've never tried it before.

How cute did that turn out? You can't tell from the picture, but the embossed lips look wet like real lipstick.
I used to make tons of cards, but somewhere over the past few years I stopped.
It's so much fun ... I almost forgot how much! I've definitely caught the card-making bug again.

I hope you'll try making your own stamps, too! They're perfect for cards, paper crafts, or really anything that could use a little embellishment.
Have you ever made your own stamps or cards?
I <3 your stamp! Pinned
this is such a fun project. I invite you to share at my blog hop( you can link up through Sat) Hugs!