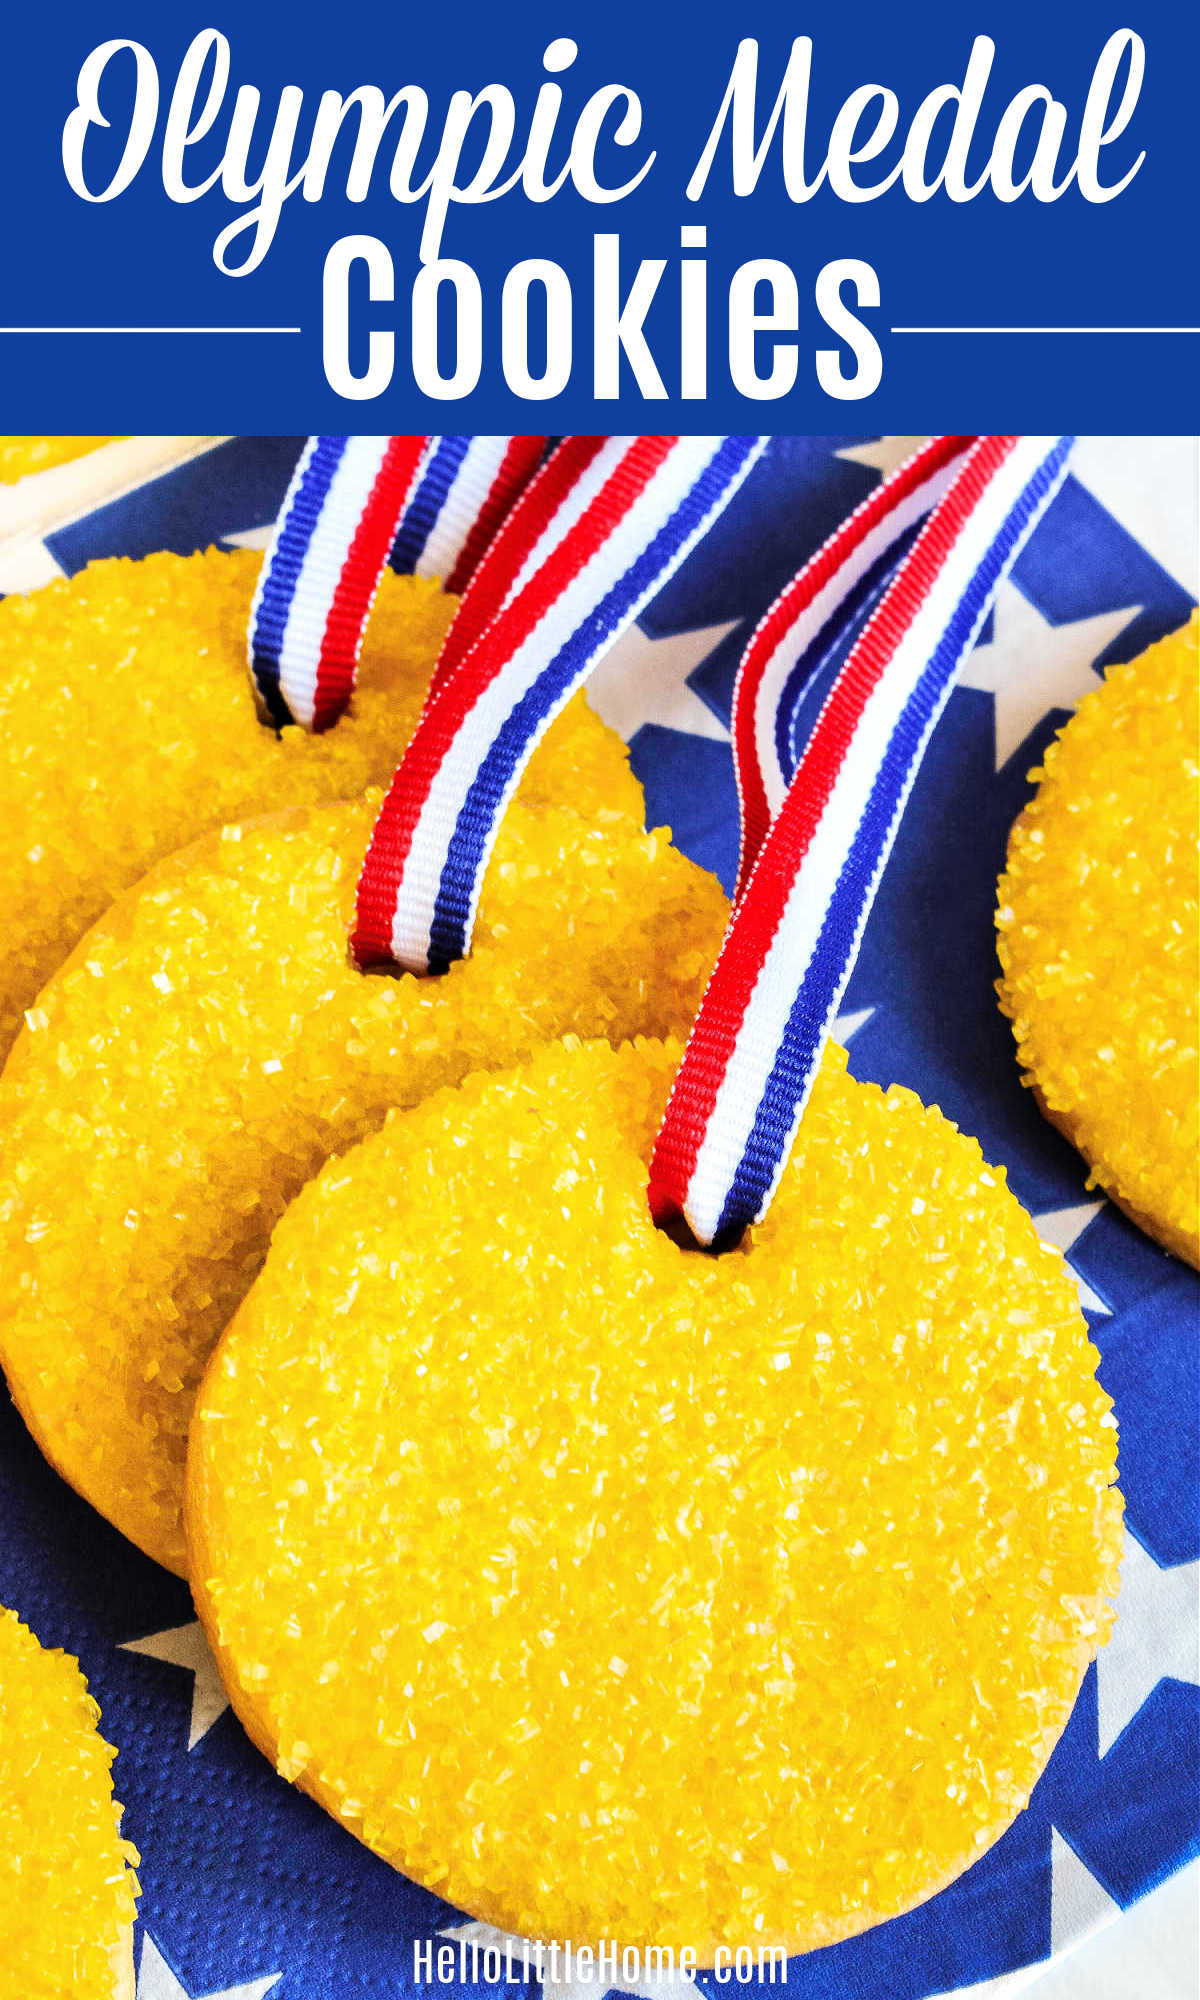
Celebrate your favorite team with these Olympic Cookies! These cute Gold Medal Sugar Cookies are super easy to make and so delicious. They're the perfect addition to any sports themed event, and they're a fun way to make watching the Olympics even more exciting!

This post contains affiliate links. As an Amazon Associate I earn from qualifying purchases.
Ginnie's Take
Looking for yummy Olympic dessert and food ideas? Then you have to try these adorable Olympic Cookies! These tasty sugar cookies are simple to make, super glittery, and so fun. They look just like real gold medals, at least ones that you can eat! Make a batch for an Olympic Party or any sports related event.
Why You'll Love This Recipe
- Cute + Delicious - Okay, could these cookies get any cuter? I think not! They have great crunchy texture from the sprinkles, and you'll love their wonderful brown sugar flavor.
- Easy to Make - The cookie dough is simple to prepare using basic ingredients, and the cookies are easy to decorate, too. Get your kids in the kitchen to help!
- Perfect for Parties - These Medal Cookies are the perfect addition to your Olympics Watch Party, but they're too good to only make every four years. Serve them for a sports themed birthday, game day party, and other competitive get togethers. They'd be so fun for a Board Game Party (go for a Board Game Olympics theme)!
Jump to:

Ingredients
These delish cookies are made with basic, easy to find ingredients! Here's what you'll need:
- Cookie Dough - This recipe uses the sugar cookie dough from my Stamped Cookies recipe, which doesn't spread much when baked (vital for helping the cookies hold their shape). The dough is made with all-purpose flour, baking powder, butter, brown sugar, one egg, salt, and vanilla extract.
- Glaze - You'll make a simple powdered sugar glaze to decorate the cookies, using powdered sugar, milk, and vanilla extract. I used this yellow food coloring to give the cookie's their gold color.
- Sprinkles - Grab some yellow sugar sprinkles for a sparkly touch. Tip: The cookies are thickly coated in the sprinkles, so you'll need a couple jars.
- Ribbon - Striped ribbon adds the perfect finishing touch! I used red, white, and blue ribbon, but you can customize the colors based on your team / country.
You'll Also Need
You'll need a stand mixer to prepare the dough, and a rolling pin to roll it out. I have this silicone pastry mat for rolling dough, and it makes clean up a breeze! You'll also need a 2 ½-inch round cookie cutter for cutting out the cookies, a chopstick for making the ribbon holes, and a couple baking sheets. I recommend lining your sheet pans with parchment paper for easier cleaning, and grab a baking rack to cool the cookies before decorating.

How to Make Olympic Medal Cookies
These homemade Gold Medal Cookies are so simple to make! You'll find a recipe card with measurements below, but here's an overview of the steps:
- Make dough. Start by whisking the flour, baking powder, and salt together. Then using a stand mixer, cream the butter and sugar, then mix in the egg and vanilla. Blend in the flour in two batches.
- Cut out cookies. Shape the dough into a flat disk, then roll it out on a floured board. Cut the cookies into rounds with your cookie cutter.
- Add holes. Use the thick end of a chopstick to make a hole in each cookie. Tip: Make the holes wide enough to fit your ribbon, and keep in mind that they will close up a bit as the cookies bake, and when they're decorated.
- Chill, then bake the cookies. Transfer the cookies to a parchment lined baking sheet, then refrigerate them for 30 minutes before baking (chilling helps the cookies hold their shape). Once chilled, bake the cookies just until they are golden brown on the bottom. Transfer the cookies to a baking rack, then let cool completely before decorating. Tip: Using a thin spatula to transfer the cookies to the baking sheet will help maintain their round shape.

Decorating the Cookies
Once your cookies have cooled, you can decorate them:
- Dip cookies in glaze. Stir together the powdered sugar, milk, and vanilla extract to make the glaze (it should be fairly thin). Then color it with yellow food coloring. Dip the top of each cookie into the glaze, then remove it, letting any excess glaze drip off. Tip: The glaze takes a while to dry, so you can dip four or five cookies before adding the sprinkles. Place the cookies on your baking sheets when not dipping.
- Coat with sprinkles. Fill a separate bowl with sprinkles, then place the cookie in the sprinkles (glaze side down) to coat. Remove any excess glaze or sprinkles from the ribbon hole (use a toothpick), then return to the parchment lined baking sheet.
- Add ribbon. Once the glaze has hardened (give it at least a couple hours), thread a ribbon through the hole, then knot the ends together. Trim the ribbon ends on an angle for a neat look.
Okay, time to admire your gorgeous Olympic Gold Medal Cookies. Aren't they the cutest? And they are just as delicious to eat!

Variations
Here are a few ways to customize these Gold Medal Cookies:
- Color - Represent first, second, and third place by making gold, silver, and bronze cookies! For silver, color the glaze with black food coloring (just a touch) and use silver sugar sprinkles, and for bronze, use brown food coloring paired with gold sugar sprinkles.
- Frosted - If you prefer frosted cookies, decorate the cookies with my butter-free cream cheese frosting or sour cream frosting. For less mess, just make sure to go light on frosting around the ribbon hole, and let the frosting harden slightly before adding the ribbon.
- Ribbon - Change the ribbon color to reflect your country or favorite team! Make sure to use narrow ⅜-inch ribbon, otherwise it may not fit through the holes.

Storage
Store your Olympic Medal Cookies at room temperature in an airtight container. They will stay fresh for three to four days. You may also freeze the cookies for one month (thaw before adding the ribbons and eating).

More Olympic Recipes + Ideas
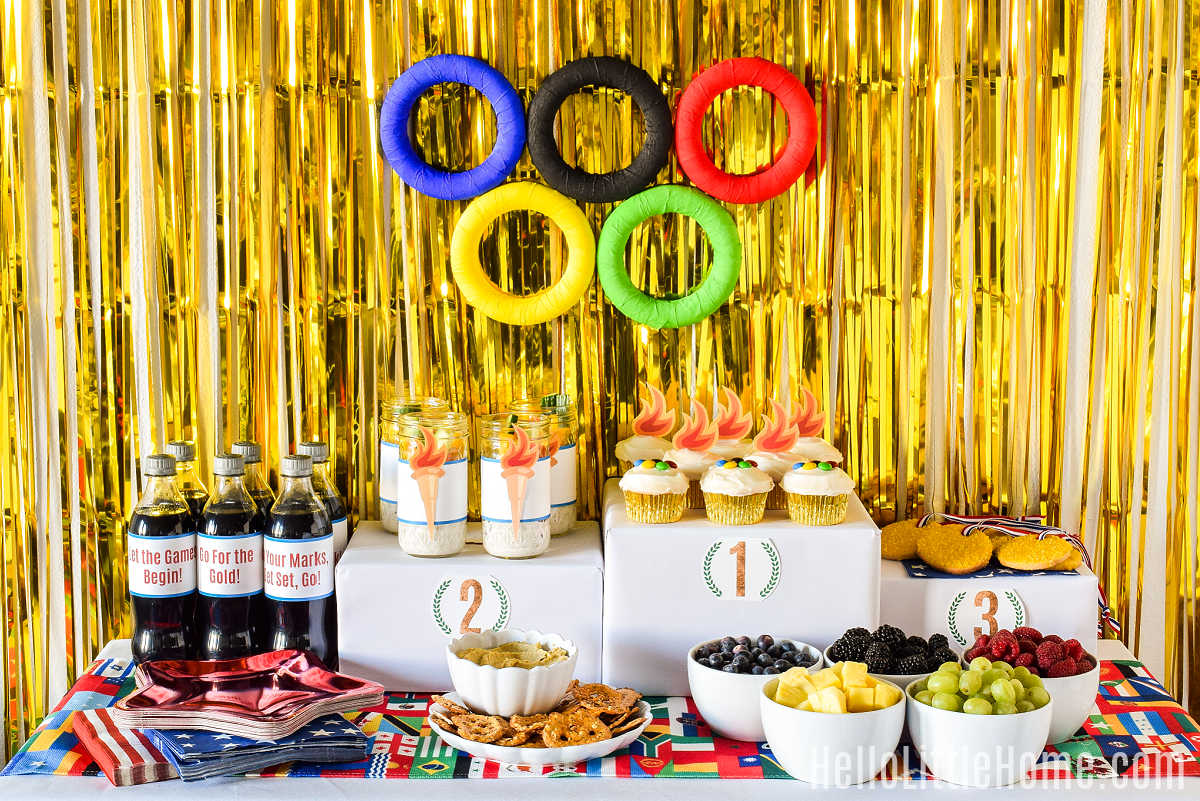
Looking for more Olympic ideas? Check out my Olympics Theme Party for lots of fun food ideas and crafts, like this DIY Olympic Torch!


Olympic Cookies
Ingredients
For Cookies:
- 2 ⅔ cup all-purpose flour
- 1 teaspoon baking powder
- ½ teaspoon kosher salt
- 1 cup unsalted butter, at room temperature
- 1 cup packed brown sugar
- 1 large egg
- 1 teaspoon vanilla extract
For Decorating:
- 2 cups powdered sugar
- 4 to 6 tablespoons milk (2%, whole, or non-dairy)
- ½ teaspoon vanilla extract
- yellow food coloring
- 2 (3.25 ounce / 92 gram) containers yellow sugar sprinkles
- ⅜-inch red, white, and blue ribbon
Equipment
- Chopstick
Instructions
Make Cookies:
- Preheat oven to 375°F (190°C). Line two large baking sheets with parchment paper. Set aside.
- Whisk together flour, baking powder, and salt in a medium bowl. Set aside.
- Using stand mixer, cream together butter and brown sugar until fluffy. Mix in egg and vanilla extract.
- Add flour to butter mixture in two batches, blending just until combined.
- Shape dough into a flat circle about 1-inch thick, then place dough on a lightly floured board. Use rolling pin to roll dough slightly thicker than ¼-inch.
- Cut out circles using cookie cutter, then use chopstick to make a hole in each cookie (wide enough to fit ribbon through).
- Transfer cookies to parchment-lined baking sheets, then re-roll dough to make more cookies. Refrigerate cookies for 30 minutes before baking.
- After 30 minutes, bake cookies (one pan at a time) just until they are golden brown on bottom (about 9 to 11 minutes).
- Let cookies cool on baking sheet for 5 minutes, than transfer to baking rack to cool completely before decorating.
Decorate Cookies:
- In a small bowl, stir together powdered sugar, milk, and vanilla extract until smooth. Color glaze with yellow food coloring.
- Place yellow sugar sprinkles in a separate small bowl.
- Dip tops of cooled cookies in glaze, then let excess drip off. Place cookies (glaze side down) in sprinkles to coat.
- Transfer decorated cookies back to parchment lined baking sheets. Let glaze harden for a few hours.
- Cut ribbon into 12-inch lengths (about 30.5 centimeters). Run ribbon through cookie hole, then knot both ends together. Trim ends on an angle.
- Enjoy cookies immediately or store in an airtight container. Enjoy!
Notes
Nutrition