This DIY Removable Wallpaper post is supported by Graham & Brown, a company I love! All opinions are my own.
Update your home with DIY removable wallpaper! It's a fun, easy project that's perfect for renters or anyone wanting to make a small change with big impact!
This post contains affiliate links. As an Amazon Associate I earn from qualifying purchases.
I'm super excited to be a Brand Ambassador for Graham & Brown, a British company that has been innovating the home improvement market for 70 years!
As part of this partnership, I'm working with Graham & Brown to interpret their fun interior design trends ... there's a new one each month! (Make sure to check out my post from last month, which is all about Gallery Wall Inspiration!)
This month’s trend is Eureka:
The Eureka trend is a chance to create delight and wonder, offering the opportunity to inspire others through your own interior design ventures.
When Graham & Brown challenged me to create a Eureka moment in my own home, I immediately thought of their amazing selection of wallpapers.

DIY Removable Wallpaper
I've always wanted to hang wallpaper in my home. I love the beautiful patterns, plus it makes big impact in small spaces like mine.
As a renter, wallpaper can be tricky though. I avoid making any changes to my apartment that will require a lot of work when I move out. Moving is hard enough without having to repaint before leaving, or worse: losing a deposit! Right?
I found a wallpaper pattern that I loved though and decided to do a little experimenting. This DIY removable wallpaper is the result!

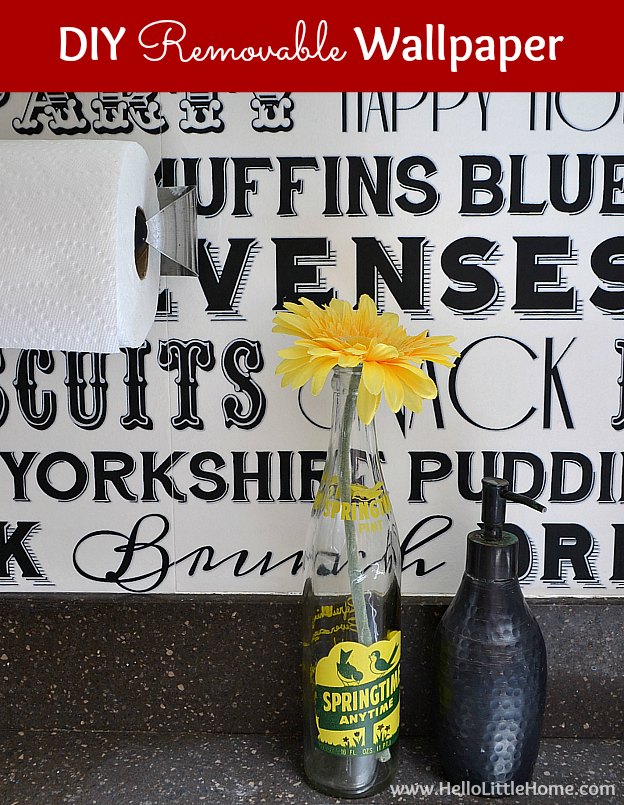
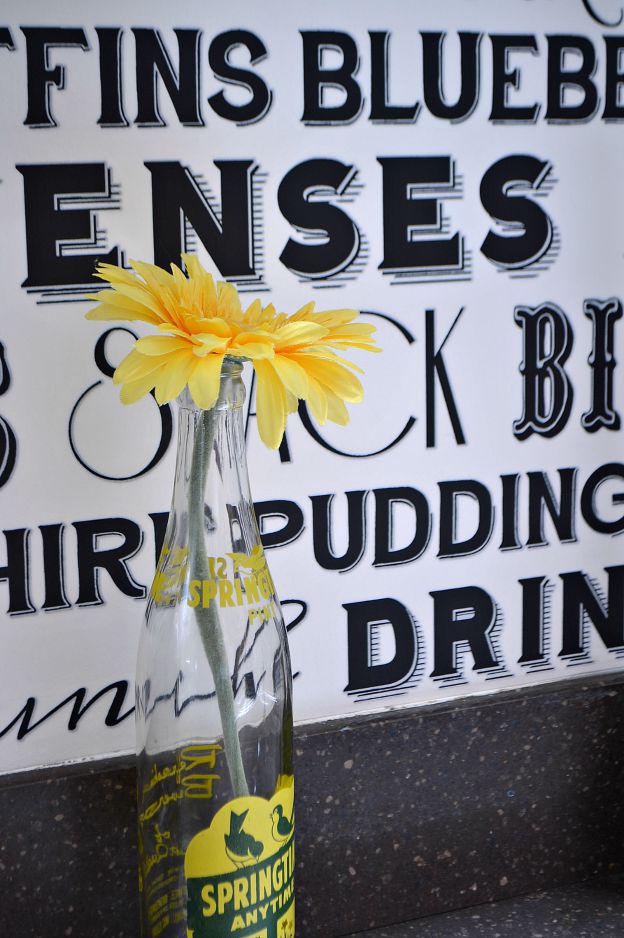
I don't see a lot of wallpaper in the kitchen, so it seemed like the perfect place to create that Eureka moment! "On the Menu" is a paste-the-wall paper, which means that's easy to apply and remove. Basically, you put wallpaper paste directly on the wall, instead of to the paper like you would with traditional paper.
The paper should peel right off the wall when you're ready to remove it. I was concerned that there would still be some paste left on the wall after removing the paper though, and I wanted to avoid repainting when I move out of my apartment.
With a little experimenting, I found a way to create a DIY removable wallpaper that should come right off when I'm ready to move. This technique is perfect for any small space, like a kitchen or bathroom backsplash.
I'm absolutely obsessed with how amazing it turned out, and I keep peeking into my kitchen to check it out! The bold text creates a unique focal point, and the wallpaper has a fun British flair.

I wanted to carry the Eureka trend over to the opposite side of my kitchen, too. Graham & Brown's Lit Star was just what I was looking for.
I love decorating with color and unique items, and this star marquee light is such a cool and quirky touch in my kitchen! This oversized star has a rustic, gold finish that gives it plenty of character.
This star marquee light is battery operated and has a small built in switch (see it at the top of the star below?), which means no dangling cords ... yay!
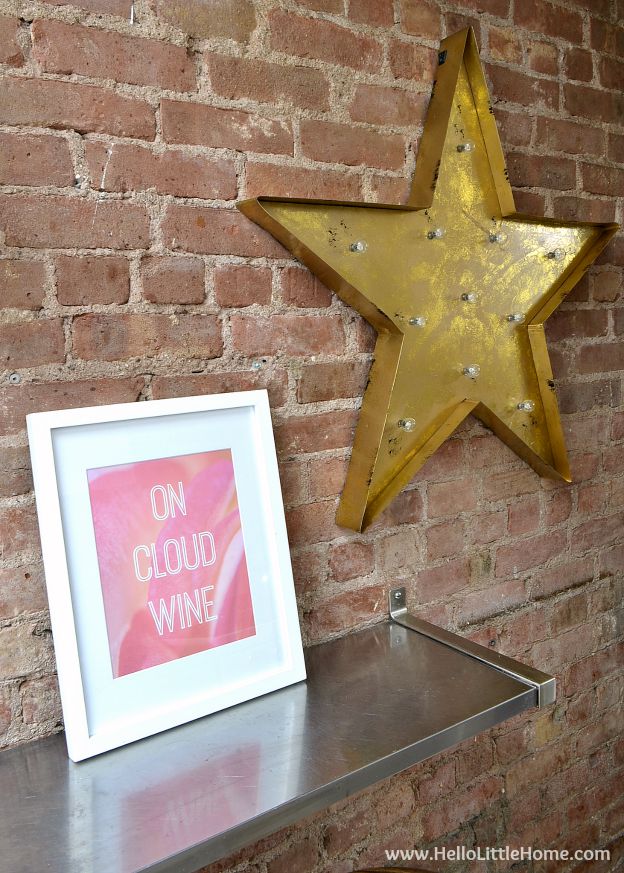
I think it looks just as good during the day as it does lit up at night. The star pairs well with my On Cloud Wine printable. which also adds some extra color to my kitchen.
Between the star marquee light and the new wallpaper, my kitchen has been completely reinvigorated.
It's amazing how a couple small changes can make such a big difference!

Okay, let's get back to the wallpaper! Do you want to know how I hung that DIY removable wallpaper in the kitchen?
Here's my secret: removable contact paper.
I applied the contact paper to the wall first, then adhered the wallpaper over it.
It worked like a charm, and when I moved about 7 months later it came off the wall easily with no damage!
How to Create DIY Removable Wallpaper
Here's what you'll need to create this DIY removable wallpaper:
- contact paper
- Sharpie
- ruler (I recommend using a yardstick. The longer length will make measuring easier.)
- utility knife or scissors
- pencil
- wallpaper (I used this "On the Menu" wallpaper pattern.)
- painters tape
- spray adhesive
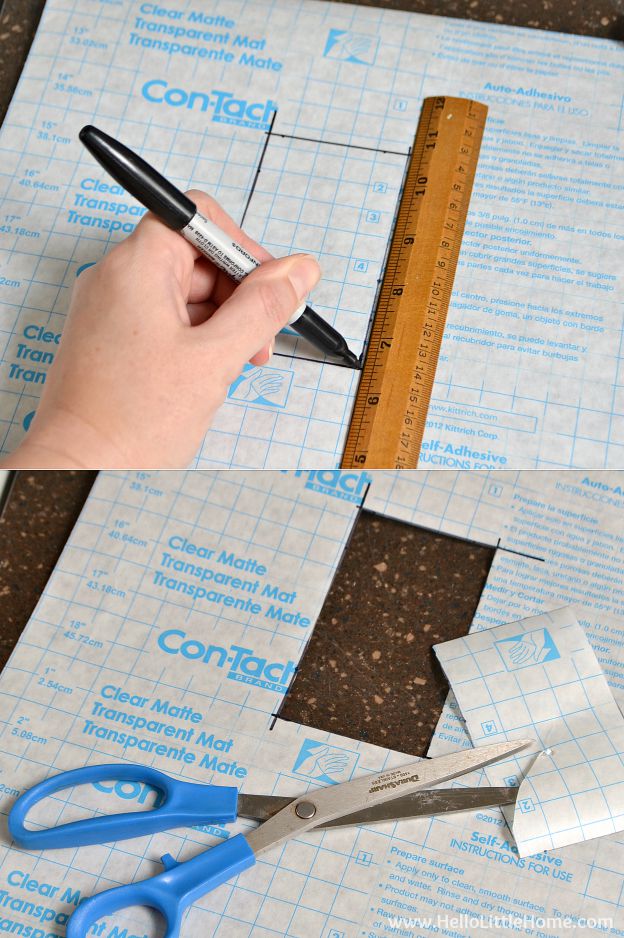
Start by cleaning and then measuring your wall. I created a drawing of my wall and noted the placement of outlets, plus holes for a paper towel holder.
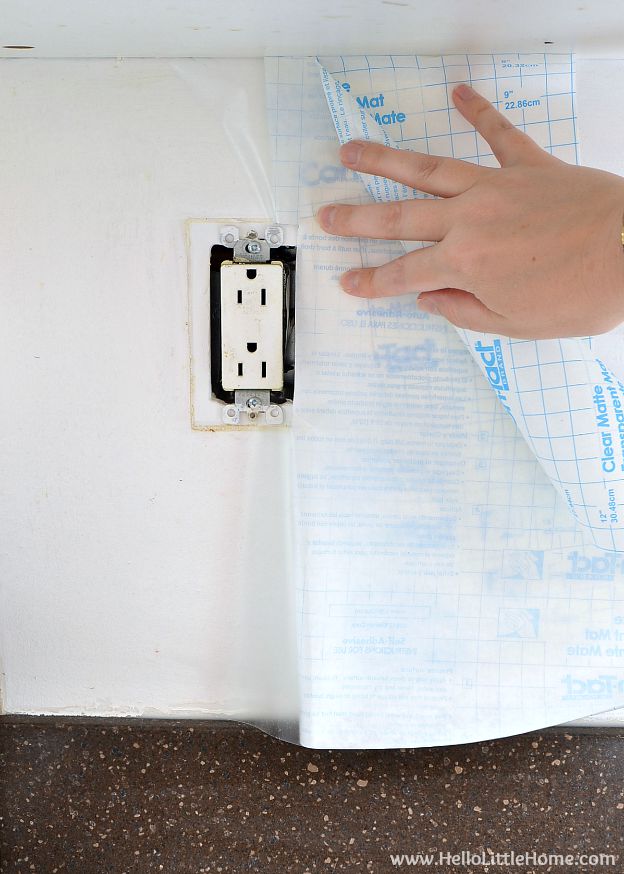
Cut out a piece of contact paper to fit your wall, then use a sharpie to draw the position of outlets (and anything else that needs an opening) on the grid side of the contact paper. Use a scissors or utility knife to cut out these openings.
Tip: keep in mind that because the sticky side of the contact paper faces the paper backing that you are drawing on, the openings in the contact paper will be reversed when you remove the backing and attach it to the wall. So if an outlet is on the left side of your wall, you'll need to draw it on the right side of the contact paper. I forgot about this and had to redo my first piece of contact paper.
You'll apply the contact paper to the wall next. Carefully peel the paper backing off one side of the contact paper and adhere it to the wall.
Work out any bubbles and reposition the paper if it's crooked.
Remove the remainder of the paper backing (try to keep it in one piece) and smooth the contact paper over the wall. Take a few minutes to ensure all edges are securely attached to the wall, and that all bubbles have been removed.
Cover the remainder of your wall with additional sheets of contact paper, as needed.
Lay the contact paper backing over your wallpaper and use it as a template to cut out your wallpaper. Transfer any openings to the wallpaper using a pencil, and then cut the openings out with a scissors or utility knife.
I needed three separate pieces of wallpaper. After cutting out my first piece, I matched it up with the pattern repeat, and then used painters tape to hold the wallpaper in place before cutting out the other pieces.
The painters tape worked very well for me, but do be careful when removing it so you don't damage your wallpaper.

Next, I covered my work surface with few garbage bags. A drop cloth would also work.
Place your wallpaper face down, and then cover evenly with the spray adhesive.
You want to coat the paper generously without drenching it. Make sure to get the edges.

As soon as the paper has been sprayed, apply it to your wall. It's easiest to start on one side and work your way to the opposite side. Use your (clean!) hands to press the paper into place, focusing on the edges and making sure there are no air bubbles or wrinkles.
If you need to add additional paper to your wall, cover your work surface with another bag or drop cloth, then repeat the spraying process. Match the pattern repeats first when applying the paper to the wall.
Tip: spray adhesive dries quickly, so you need to work fast. Make sure you are spraying the paper close to where it will be applied. The wall I was covering was small, so my paper was easy to work with. You may need another person to help if you are working on a larger area.
Allow the spray adhesive to dry for at least a few hours or overnight. When the adhesive is dry, reattach any outlet covers or other items to your wall. Then step back and admire your DIY removable wallpaper!
Tip: I left a small strip of contact paper exposed in an inconspicuous spot. When I was ready to remove my paper, all I'll needed to do was start peeling!

Love this DIY Removable Wallpaper and want more?
You'll love these other decor ideas, too:
- 5 Creative Ways to Use Wallpaper
- Tips for Organizing a Small Kitchen
- 3 Easy Ideas for Decorating with Natural Elements
- My NYC Apartment Tour
- How to Clean Your Kitchen in 15 Minutes

I'm so glad I decided to hang this gorgeous DIY removable wallpaper in the kitchen! It's really made a huge impact in my tiny space.
How do you create Eureka moments in your home?
Really nice, the whit and yellow plus some black is looking good .
Thank you!