Bring a fun seasonal touch into your home with this DIY Spring Flower Craft! You need just a few basic supplies, and it's so easy to make. The perfect spring craft project for kids or adults!

This post contains affiliate links. As an Amazon Associate I earn from qualifying purchases.
I don't know about you, but I love a good seasonal craft. Especially when it's still cold outside, but I can't resist counting down to spring!
My craft stash has lots of fun papers, and I love making paper flowers. So the inspiration came easy for this project.
I had a lot of fun putting this together, so I thought I'd share the process with you. This DIY paper flower craft was super easy, and if you love pretty paper, this is a great project to use up those little scraps that inevitably accumulate.
This is a great craft project for adults and kids, so gather everyone around the table and see what happens!
Jump to:
Supplies
Here's what you'll need to make you own paper spring flowers masterpiece:
- Decorative Paper - For making the paper flowers. Construction paper, cardstock, and other colorful papers will all work.
- Letter-Size Paper - You'll glue the flowers to this paper. It doesn't have to be white, and other sizes of paper will work too. Choose sturdy cardstock, if you have it.
- Scissors - For cutting everything out.
- Craft Glue - I used Aleene's Tacky Glue. Hot glue would also work.
- Buttons - To make the flower centers. Any style, color, or size will work!
- Picture Frame - Optional, but a simple picture frame adds a lovely finishing touch.

Create the Flowers
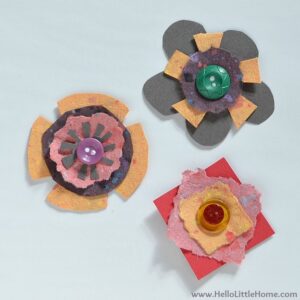
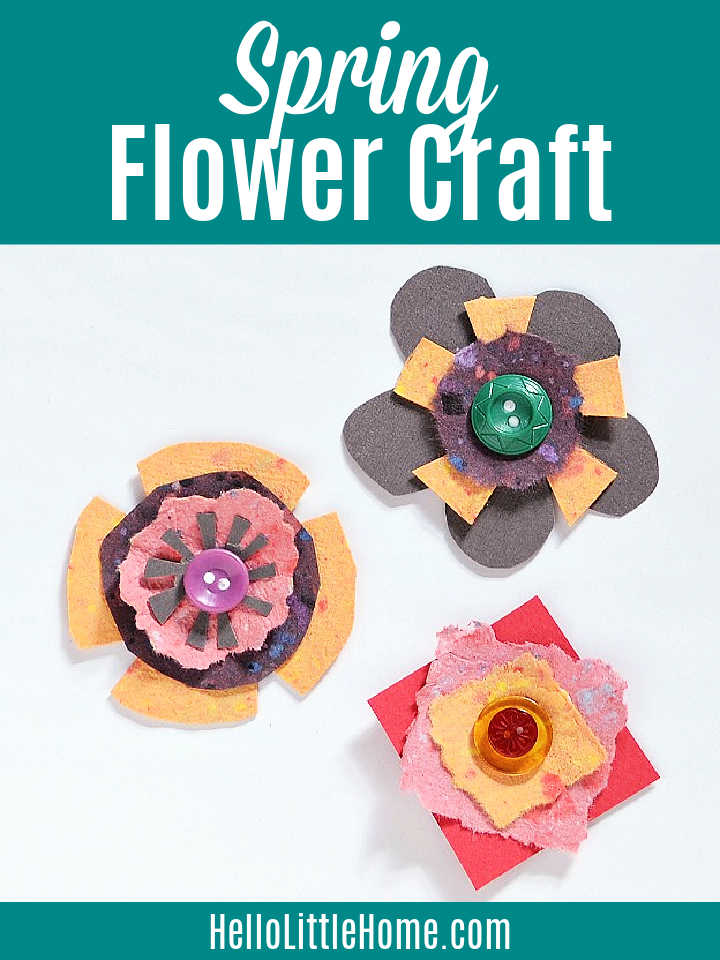
Each flower is made by layering paper, then attaching a button to the center. You'll find printable instruction below, but here's an overview of the steps:
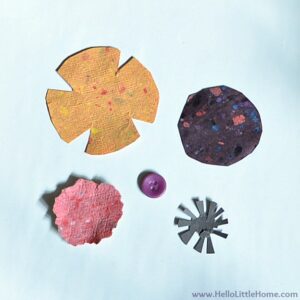
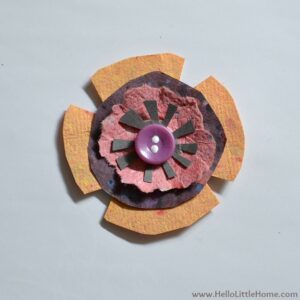
- Select your papers. Start by picking out the papers you'd like to use, along with a coordinating button. Experiment with different colors and textures to see what you like best, and don't worry about everything matching perfectly.
- Create the pieces. Cut out a small piece of paper for the flower's center, and then cut out progressive larger pieces for each layer. Tip: You can add as many layers as you'd like!
- Glue pieces together. To assemble your flowers, place a small dot of glue in the center of the largest piece, then attach the next smallest piece on top. Repeat this process until all the layers are glued together.
- Add the button. Finish the flowers by gluing the button on top.


Assembling the Art
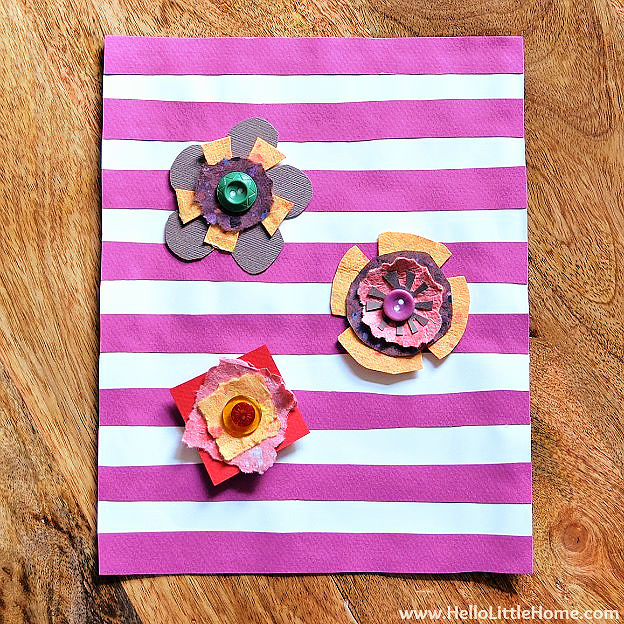
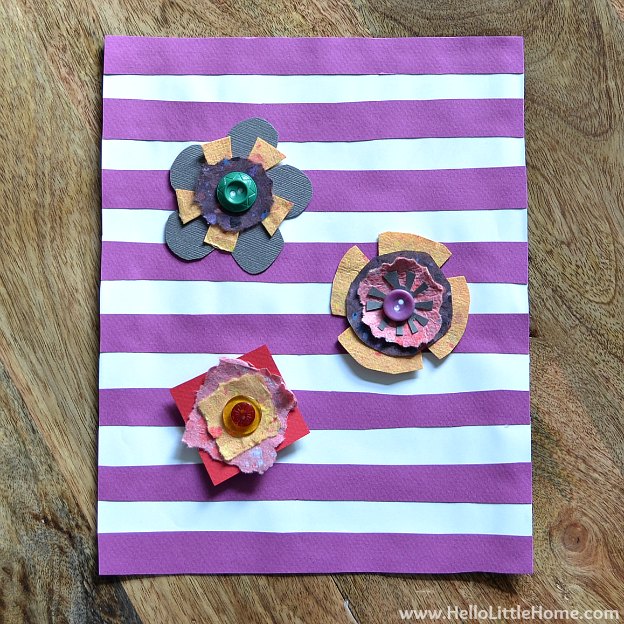
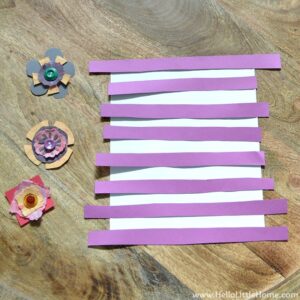
To turn the flowers into art, you need to attach them to a piece of paper. Here's how to do it:
- Cut out the stripes. While your flowers are drying, cut out strips of purple paper that are slightly wider than your background paper.
- Adhere the stripes. After you've cut out your stripes, position them on the background paper. When you are happy with the layout, attach each strip with a thin line of glue.
- Trim stripes. Cut off excess paper from the edges. To ensure that the art dries flat, place it under a stack of heavy books until the glue is dry.
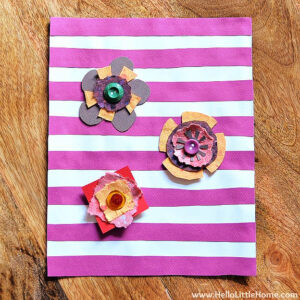
- Attach the flowers. Once the glue has dried, attach the flowers to the striped paper with a dot of glue. Let dry.
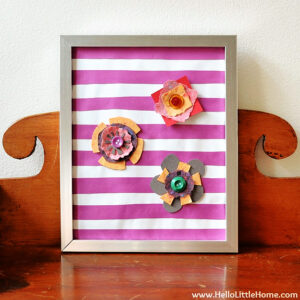
When you DIY flower art has dried, pop it into a frame, and you are finished! Wasn't that fun and easy to make?

Variations
Feel free to add your own touch and have fun getting creative with this paper flower craft! Here are some ideas to try:
- Make as many (or as few) flowers as you'd like. You could do just one large flower or a bunch of smaller flowers.
- Experiment with other materials. Try adding other ephemera to your flowers, such as ribbon, glitter, paint, stickers, and more.
- Vary the background. You can easily change the size of the paper background. Any sized paper, from super small to extra large, will work. You can also use glue the flowers to pre-framed canvas (instead of paper). Paint the canvas first for an artsy touch!
More Spring Crafts to Make
Looking for more crafty ideas? Try one of these projects next:
- Pop this Hello Spring Art (free printable PDF) into a frame, and your seasonal decorating is done!
- Now's the time to make these DIY Yard Games so you can enjoy them all summer!
- These cute Mason Jar Easter Baskets are so fun to make (and to gift).
- Turn a simple grocery store bouquet into an affordable Mason Jar Flower Arrangment.
- These DIY Bubble Wands will entertain your kids from spring through summer!
- Check out this roundup of Spring Crafts for even more ideas!

Spring Flower Craft
Equipment
- craft glue
- Picture Frame (optional)
Materials
- Decorative Paper (various colors and texture)
- 1 piece Letter Size Paper (for background; other sizes work, too)
- buttons
Instructions
Make Flowers:
- Cut out a small piece of paper for the flower's center, and then cut out progressive larger pieces for each layer.

- Place a small dot of glue in the center of the largest piece, then attach the next smallest piece on top. Repeat this process until your layers are all glued together.
- Glue a button to the center of each flower.
- Repeat process to make more flowers, then set aside to dry.
Assemble Art:
- For stripes, cut out strips of paper that are slightly wider than your background paper.
- Position the paper strips on the background paper. When you are happy with the layout, attach each strip with a narrow line of glue. Cut off excess paper from the edges.
- Place the striped paper under a stack of heavy books until the glue is dry.
- Once the striped paper is dry, attach the flowers with a dot of glue on the back of each flower. Let dry.
- Place flower art in a frame (you may need to remove the glass to fit the flowers), then display.
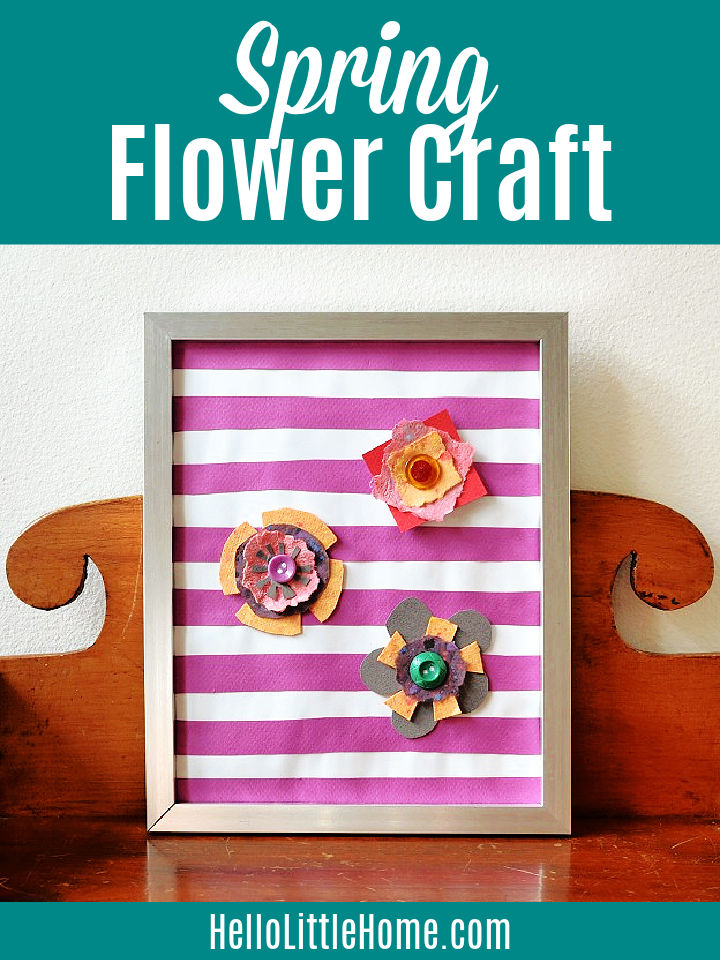
I love the cheerful striped purple background against your paper flowers. Thanks so much for linking up at our Link it or Lump it party!
Amy
Thanks, Amy! I knew I wanted to do something with stripes:)
Super cute project! I love the pretty flowers. Thanks for sharing tutorial.
Have a wonderful week!
Hugs from Portugal,
Ana Love Craft
Thank you so much, Ana! Have a great day:)
Love this! Thanks for sharing!! Pinned.
Thank you:)
How simply happy and cute. There's nothing like crafting on a dreary day that brightens it right up doesn't it? Thanks for sharing 🙂
Thank you! A fun project always cheers me up, too:)
Stopping by from the Wednesday roundup! Super cute and simple, I love it!
Thank you so much, Kate:) It was so much fun to put together!