Learn how to make your own notepads with this fun + easy tutorial! Plus, get a FREE "Spring Has Sprung" printable notepad template!

This post contains affiliate links. As an Amazon Associate I earn from qualifying purchases.
Spring has been on my mind lately. It's almost here, and I cannot wait!
This has been the craziest winter ... hot one week and cold the next. These customized DIY notepads have been cheering up my desk, reminding me that it's almost time to put this weird winter behind me.
If you are looking for a fun gift idea, why not give custom notepads? They're so easy to make and can be personalized however you'd like.
Keep reading to learn how to make one, plus get my free Spring Has Sprung printable!

DIY Notepads
I first shared these Printable Notepads over at The Pinning Mama, and now that spring is returning, I wanted to give you the full tutorial here, too!
These homemade notepads are so simple to make, and they are sure to brighten up your desk or make the perfect gift for someone who needs a little spring cheer ... who doesn't?
Keep one for yourself or give one as a spring or Easter gift.
To make things even easier, I'm also sharing a free Spring Has Sprung printable which you can use to make these notepads. Yay!
How to Make Your Own Notepads
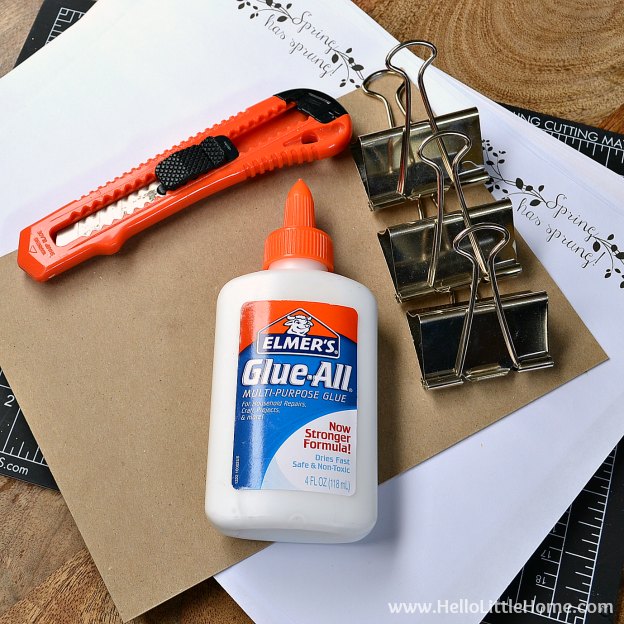
Want to make your own DIY Customized Notepads? Here's what you'll need:
- printer
- printer paper
- self-healing mat
- utility knife
- ruler
- thin cardboard
- three large binder clips
- multi-purpose glue (like Elmer's or PVA)
Start by printing out the free Spring Has Sprung printable (scroll to the end of the post to get it) on regular printer paper. To make a 50 page notepad, you will need to print 25 copies. To make a larger notepad, simply print more copies.
If you would like to create your own custom message or image on the notepads, open a blank document in Microsoft Word. Next, set the page orientation to landscape, and create two columns. Then, simply insert your text or clip art. For detailed instructions on how to do this, see my DIY Personalized Notepads post.
Once you've printed the notepad pages, stack them up very neatly. Find the center of the page, and then cut the pages in half with the utility knife. Use a ruler to keep your lines straight.
You'll also want to cut a piece of cardboard to match the size of the notepad pages. You can upcycle the cardboard from a used notepad or a small box.

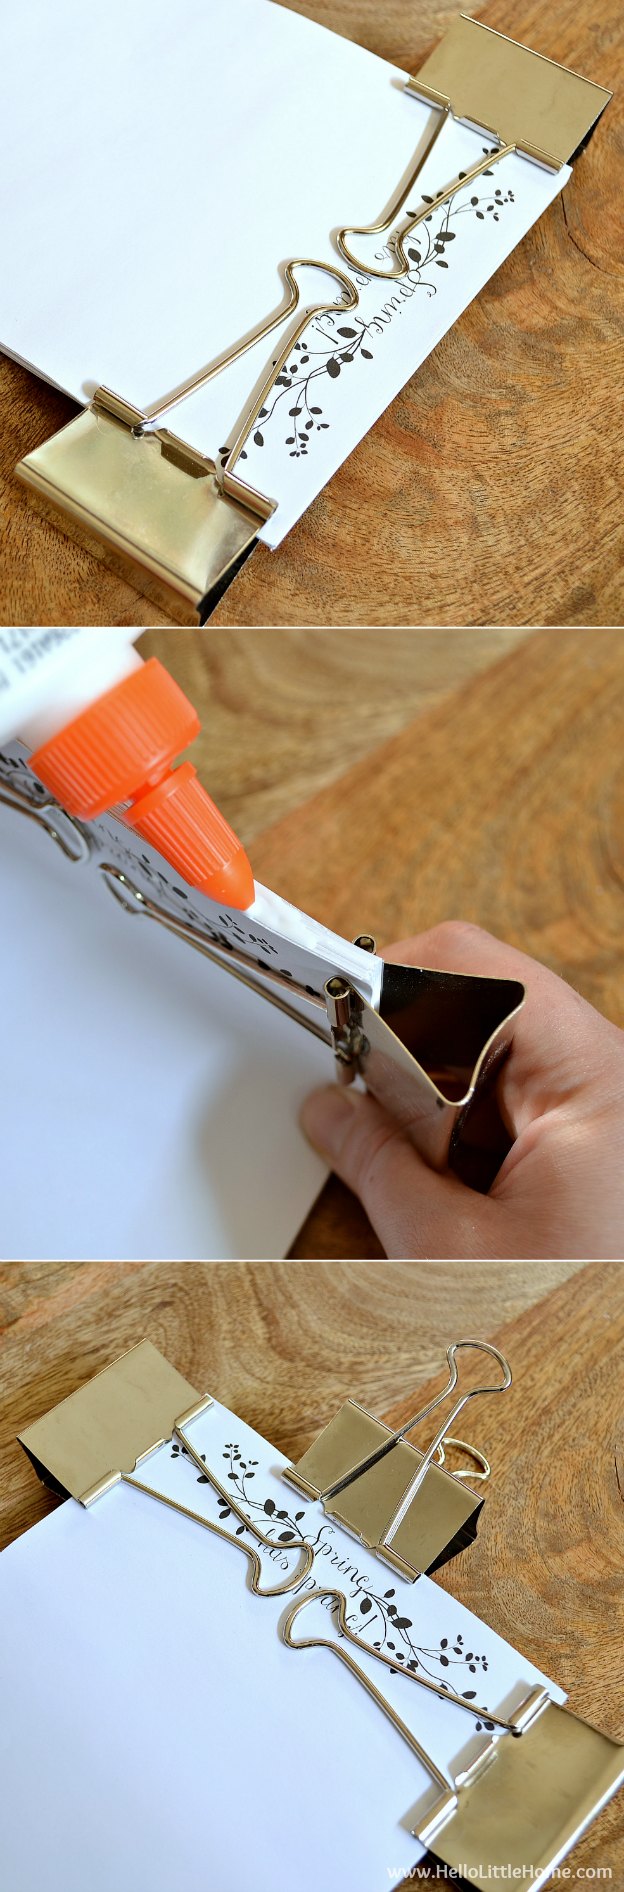
Stack all the pages up as neatly as possible and place the cardboard piece on the bottom. Clip the sides of the pages together with two binder clips, leaving the top free.
Apply a thin layer of glue to the top edge of the pages. Smooth the glue with your finger so it is even.
Once the glue has been applied, place another binder clip on the top edge of the notepad and let dry. Fasten the binder clip back on and let dry completely.
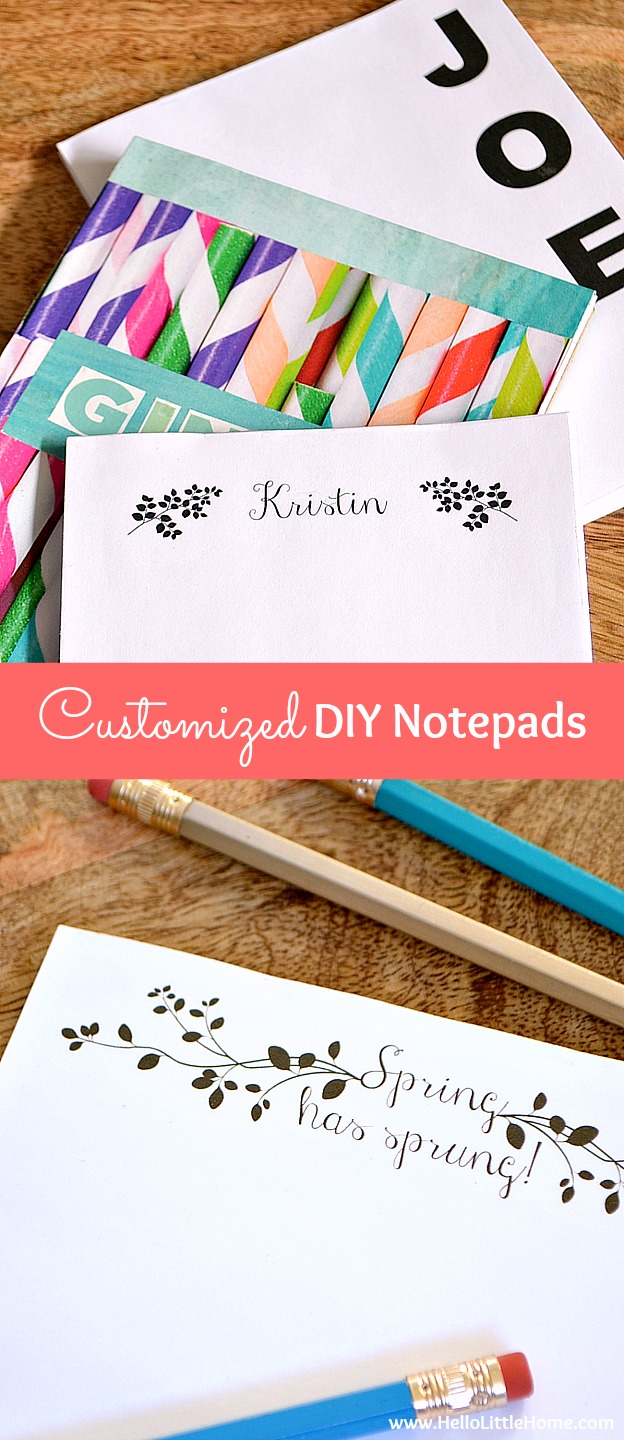
Once the glue has dried your Customized DIY Notepad is complete! Wasn't that easy?
I like to package these notepads with a set of pens or pencils for a simple gift. Tie a little string around the notepad and pencils to hold everything together.


Download the Notepad Printable
Click anywhere on the image below to access the free printable:

For more notepad inspiration, check out my DIY Personalized Notepads post!
Are you ready for spring's arrival, too?
I tried it a few times now but my pages of my notepad keeps curling up at the bottom of each page.. always the second day. Do you maybe know why?
Hi Tessa! That's never happened to me, so I'm not totally sure. A couple things to try: make sure the top (where you're glueing the pages together) is totally straight, flat, and even. If it's a little off, there could be some tension causing the pages to curl a bit. I would also try stacking some heavy books on top of the notepads after they are dry for a couple days. That will hopefully smooth out any issues. If your home is warm / humid, that could possibly be causing the issue, too. Hope that helps!