Are you trying to create a TV Gallery Wall? Check out these simple step by step tips for creating a Gallery Wall with TV ... it's easy!

While I was visiting my sister a couple months ago, my husband got a wild hair to do a little decorating.
He hung a gallery wall in our living room. Well, it turns out his decorating style is a little wonky!
Joel always says that decorating decisions are up to me. And although he has some strong opinions, that's pretty much true. I'm also the one who does all hanging, assembling of IKEA furniture, etc. It's just easier that way.
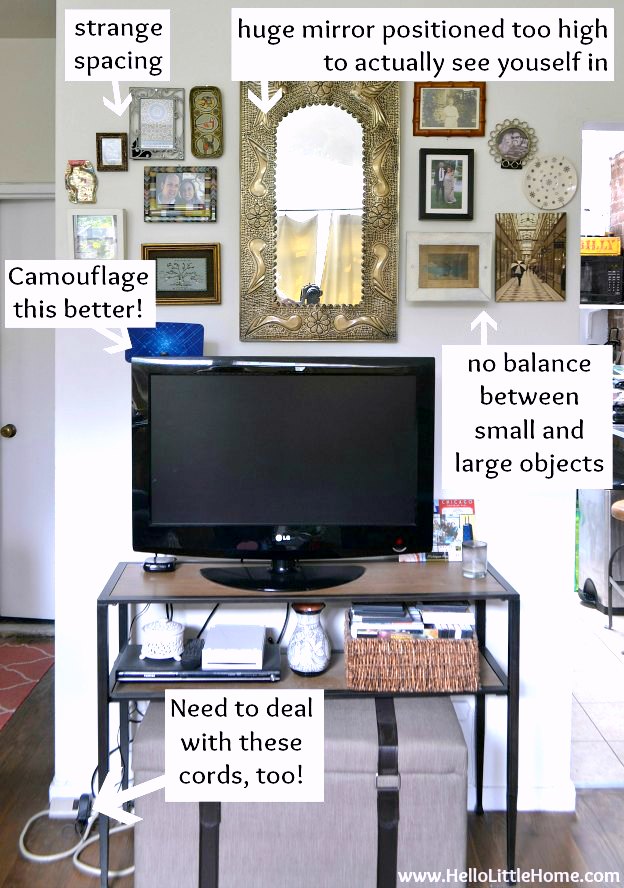
So when he told me that he hung a gallery wall above our TV, I was a little nervous. Do you want to see the before? It had a few issues!
TV Gallery Wall
We lived with his gallery wall as-is for a few months until I finally took it down and started over. All those holes ... it wasn't pretty. While I appreciated his effort, I decided that a gallery wall revamp was in order!
One of the reasons I wanted to hang art here was to disguise our TV. We also gave up cable a few months ago and with that came a funny blue antenna. It's definitely not the most picturesque!
I love the mirror Joel hung, but it was too high to view anything other than my forehead. There was also no balance between the large and small objects, and obviously, spacing was an issue, as well.
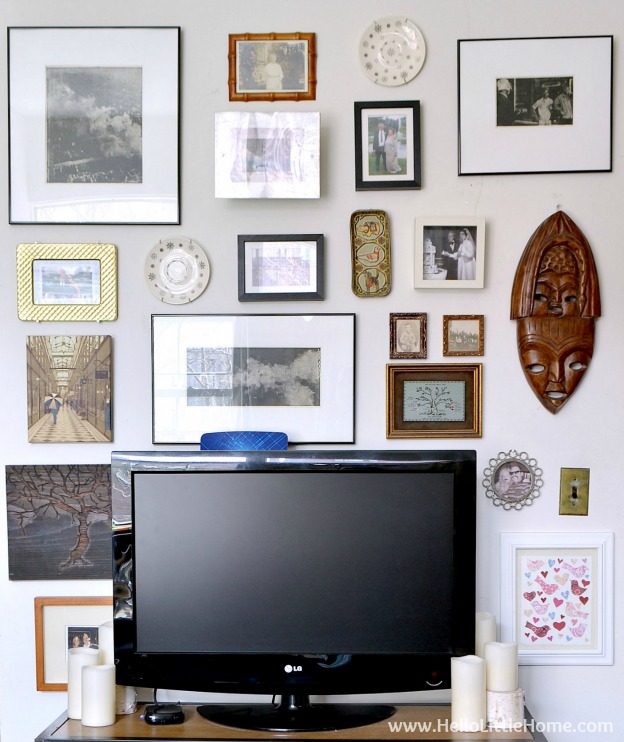
I love how my TV gallery wall makeover turned out!
I took advantage of our high ceilings and went vertical. The TV blends in with the art, and that annoying blue antenna doesn't stick out as much either. That mess of cords finally got cleaned up, too. Success!
How to Hang a Gallery Wall with TV
If you want to do a gallery wall, planning is must! Follow these easy tips to get started.
Decide on the Picture Arrangement ... before Making any Holes!
Start by laying out your pictures out on the floor and rearrange them until you're happy with the placement.
If you get stuck, walk away for an hour or two and return with fresh eyes to finish the job.
I took this picture about midway through the process when it wasn't quite right yet.

Pay Close Attention to Spacing
When creating a gallery wall, spacing is paramount.
Although the space between every object doesn't need to be equal, it does need to make sense. Don't hang two things right on top of each other, and then leave a huge hole somewhere else.
Spread your large pieces throughout the wall, too. In my finished gallery wall, you'll see that the large pictures are spaced out, and the area in between them is filled with smaller pieces of various sizes and shapes. It's all about balance.
Add Your Personality
One of the things I love about gallery walls is that they have so much personality!
I like to include things I've collected over time, items with personal meaning, and fun finds.
Scour your local thrift stores for unique frames, plates, and other decorative objects. You might even score a cool painting.
Check out some of my favorite thrift store finds below!

Hanging the Art
Once you've decided on the layout, it's time to hang your wall.
Start with the largest pieces first, then slowly add the small art. Take your time, making small changes as you go (if necessary).
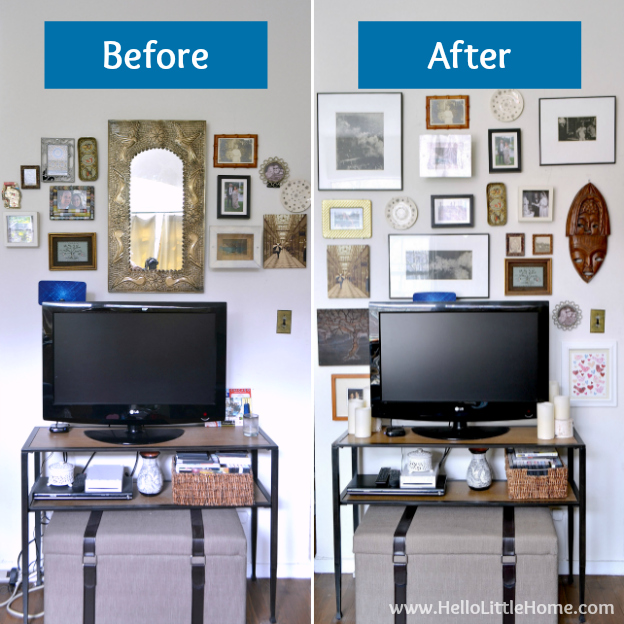
How about a before and after?
I'm really happy with how it turned out ... the tweaks I made created a big difference!
Want more gallery wall inspo? Check out my gallery wall tips and tricks and check out the wall I created in my NYC entryway, too!

Has your significant other ever done any decorating you weren't too happy with?
I love it that your husband did it first. Lol. I would have died! Love the revamp! Thanks for linking up to the DIY'ers!
It looks beautiful and I love all the tips.Pinned. We truly love having you be a part of our party. I hope you will get a chance to stop by tonight at 7 pm. It's not a party without you!
Happy Monday! Lou Lou Girls
Fabulous Gallery Wall! Thanks so much for sharing on Show-Licious!
~ Ashley
Thank you so much, Ashley!
I love gallery arrangements, and yours turned out fantastic! I really like the mix of sizes and items that you chose. Thanks for the great tutorial, and thank you for linking up at Wake Up Wednesday. We hope you'll come back again next week.
Thanks for stopping by and for hosting, Karen! I'm so glad you like it:)
I love the way it turned out! I love gallery walls! When I put mine up I rearraged it on the floor for weeks before putting it up. It is hard to get right!
Thanks, Shambray! You're right ... it is hard to get the perfect mix. It definitely helps to "live" with it for a bit:)
Gorgeous gallery wall! Pinning this!
Love it! Pinning now. Yes, your restyled version works better and hides that blue box neatly. Omg, whenever my husband mentions decorating I get a lump in my throat, haha. Thanks for linking up to The DIY'ers!
Thanks, Jennifer! Ha ha ... I feel exactly the same way;)
Love the gallery wall revamp! Thanks so much for linking up to the party. xo
Thank you so much, Kelly! I had a ton of fun with it:)
I love the redo, so pretty and you have such a great mix of interesting objects.
Thanks, Marty! I love mixing in unique objects.
I love the interesting items you used like the mask!
Thanks, Heather! That mask is a favorite of mine:)
Oh my, that's gorgeous! I'm getting ready to do something similar in our family room. Thanks for the inspiration!
Oooh ... I can't wait to see pics of your wall, Alison! I hope you'll share:)