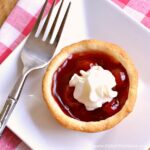
Treat yourself to these yummy Mini Cherry Tarts ... a simple recipe straight from my mother's cookbook!

This post contains affiliate links. As an Amazon Associate I earn from qualifying purchases.
Do you have any recipes that bring you straight back to childhood?
These Mini Cherry Tarts are one of those recipes for me. My mom was a wonderful cook, and she made these easy cherry tarts all the time. And as my sister reminisced recently, our little family of four could eat a pan in one night!
It had been years since I'd had a bite of these Mini Cherry Tarts, so I was excited when my sister sent me the recipe. The tarts tasted exactly how I remembered, and I knew that I had to share the recipe with you!

Apart from their fantastic taste, the best thing about these Mini Cherry Tarts is how simple they are to make. Don't let the petite size of these easy cherry tarts fool you, but the recipe is really simple.
These tasty treats are basically mini cherry pies in muffin tins, but better! I love a good pie crust, so I think what makes this recipe unique is the easy cream cheese crust. You only need three ingredients to make it, and it's so delicious!
And since this easy cherry tart recipe uses pie filling, it comes together fast! Less time cooking and more time eating is always a winner in my book!
* This recipe is also available as Web Story 👉 "Cherry Tarts". *

How to Make Mini Cherry Tarts
Like I mentioned, these easy cherry tarts were one of my mom's (and our whole family's) favorite recipes. I know she loved these treats because of how fast and delicious they are, and I know you're going to love this recipe, too!
You really only need four simple ingredients to make these cherry tarts with cream cheese crust ... pretty awesome, right? You'll start by combining cream cheese, butter, and flour to make that delicious crust.
I like to use unsalted butter in my cooking, so I added a generous pinch of salt, too. If you use salted butter, you can skip the salt.
Once the crust ingredients are combined, you'll separate the dough into 12 equal pieces, then press it into a muffin tin. The dough is fairly rich, so if you use a nonstick muffin pan, you can probably skip the nonstick spray, but I added some just in case.

After the dough is pressed into the muffin tins, it's simply a matter of adding the cherry pie filling to the crust. Look for a high quality filling without a lot of crazy ingredients.
You could definitely experiment with different flavors of pie filling, too. My mom always used cherry, but I think I'll try blueberry filling next time.
These mini cherry pies only take about 12 to 15 minutes to cook in a hot oven ... almost instant gratification. If you can resist, let them cool a bit before you dig in!
These yummy cherry tarts are great on their own, but they're even better topped with a generous serving of whipped cream. Then, just try to stop at one!
Mini Cherry Tarts
Ingredients
- 8 tbsp unsalted butter
- 3 oz cream cheese, at room temperature
- 1 cup flour
- pinch salt
- nonstick cooking spray
- 1 (20-oz) can cherry pie filling
- whipped cream, for serving
Instructions
- Preheat oven to 450 degrees.
- Mix together butter, cream cheese, flour, and salt until it comes together in a ball.
- Divide dough in half. Then, divide each half into half again. You should have 4 pieces of dough. Divide each of these pieces into thirds so you have 12 pieces of dough.
- Spray a muffin pan with nonstick spray, then place a dough ball in each muffin tin.
- Press the dough into the bottom and up the sides of each muffin tin.
- Divide cherry pie filling evenly between crusts.
- Bake tarts for 12 to 15 minutes, or until crust is golden brown.
- Let tarts cool, then served topped with whipped cream. Enjoy!
Nutrition

Don't these Mini Cherry Tarts look tasty?
I know you're going to love them just as much as my family does!

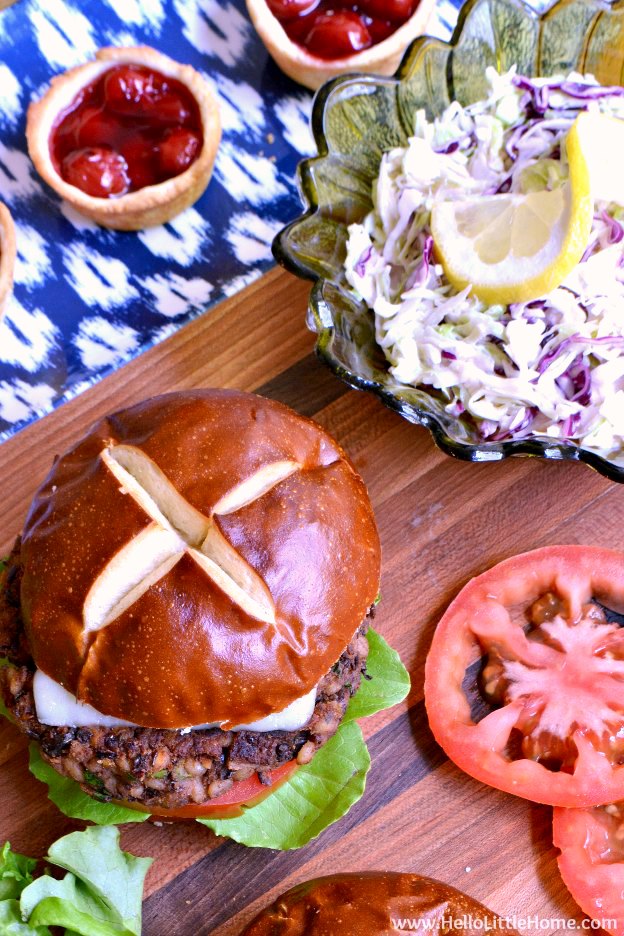
Are you looking for a delicious summer dinner idea?
Try serving these Mini Cherry Tarts with my Southwest Black Bean Veggie Burgers and Greek Coleslaw with Feta and Lemon like I did.
Everything was so delicious together, and I know I'll be enjoying this meal again soon!
What is your favorite family recipes?
I commented here a few years ago when I first found this recipe, and I just made these lovely tarts again. It’s officially one of my favorite recipes and has inspired me to try baking more tarts. Thank you again (and to your lovely mom!) for sharing with us. I bake often, but rarely there is a recipe that steps beyond the taste buds to the heart. This is one of them. 🙂
Thank you so much for your sweet note, Hanan! I'm so glad you found this recipe and are loving it 🙂
Absolutely wonderful texture. If flour doesn’t fully incorporate just knead it in. I wondered about no sugar but went the recipe as is and the fillings gave it the sweetness. I made caramel apple, apple, peach, blueberry, and cherry. I made these some 30+ years ago but couldn’t find the recipe. Your recipe is better and easier to work with than I remember of the other. Thanks for posting it.
You’re welcome, Sandy! I’m so glad you’re loving the tarts 🙂
I added 2 Tbsp of sugar to the dough and it was delicious. The rims of the shells did burn so I will lower the heat. It might just be my oven. They still tasted great. A nice crunch.. This will be my go to pie shell as well. Really good!
I'm so glad you enjoyed the tarts, Joann! 🙂
They were delicious
So so so good!!! Made this recipe tonight with 6 Wilson mini tart pans. I doubled the crust recipe..used 1 margarine and 1 butter stick since I needed to use up some margarine and I knew it'd soften faster. Perfect amount for the 6 tart pans. I also chopped up some fresh sweet cherries and added a dash of almond extract to the canned mix....ya making this again!!! Thank you!!!!!
I think I personally messed up making the dough by mixing it more like a pie dough (crumbly), and not with a stand mixer but by hand. Even the fats aren't evenly distributed the resulting crust is crumbly, unevenly baked, and goes not hold the filling. My result was like theirs, but I realize it was improper mixing. I was worried about making the dough too overworked or tough, which is worse than flaky and weak. So in this recipe there needs to be more detailed instructions of how to mix the dough properly. I think that's why some people… Read more »