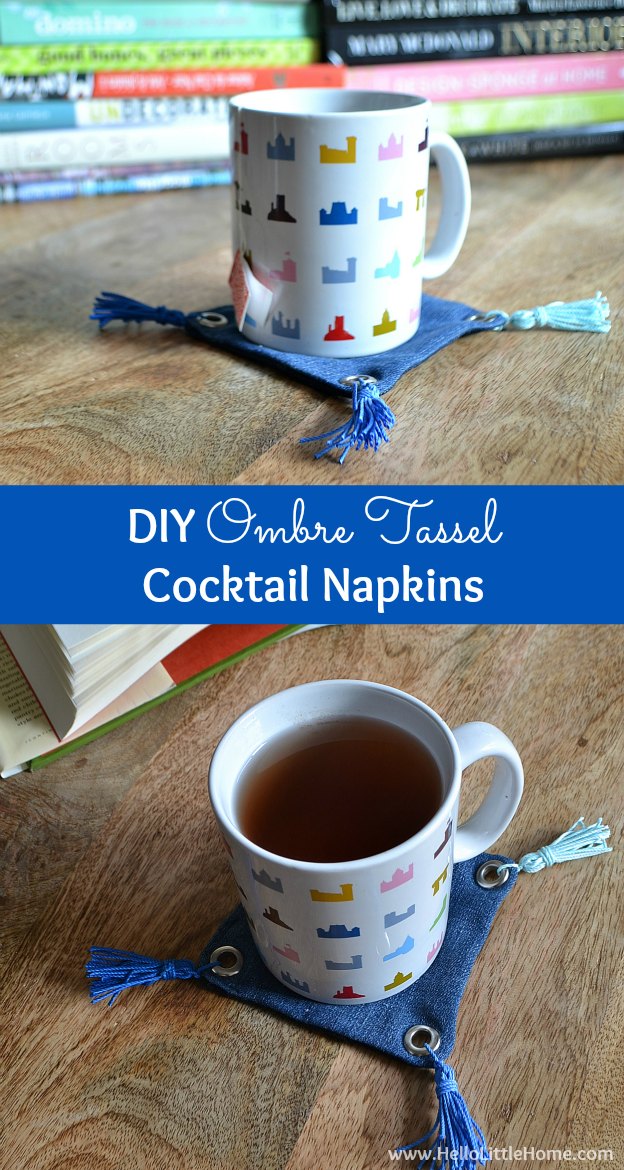
Learn how to make these fun DIY Ombre Cocktail Napkins ... they're the perfect addition to any tabletop!
When I attended the HGTV Blogger Block Party last week, I had the chance to create a DIY coaster.
Mine definitely wasn't a masterpiece, but it did get me thinking about all the fun ways to create them.
My home has a few coasters already, and I wanted to make something a little different. I had some worn-out jeans set aside for the perfect DIY project, so I decided to create some cocktail napkins using them.
Of course, everything is better with some embellishment. I love tassels and couldn't resist incorporating them. That's how these DIY Cocktail Napkins came to be!

DIY Cocktail Napkins
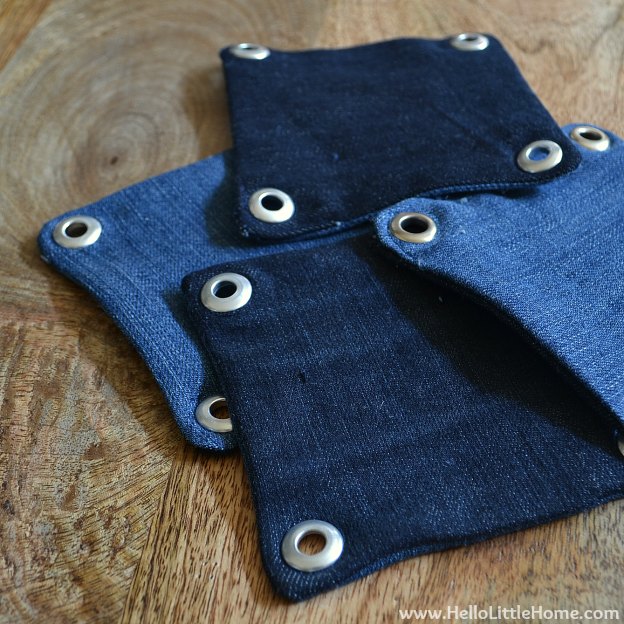
I had so much fun making these cocktail napkins! They're a great way to use up scraps of fabric or a pair of worn-out jeans. I used two different pairs, so each side is a different shade of blue.
The tassels were created from blue cording - ranging from light to dark - to create an ombre effect. Then they were threaded through the grommets.
If you are looking for a stress-relieving project, grommets are a great option (all that pounding)!
Want to make your own Cocktail Napkins?

Cocktail Napkin Supplies
To make this project you'll need:
- denim fabric
- scissors
- thread to match the denim
- sewing machine (or sew the napkins by hand)
- cording (in 4 shades, from light to dark)
- heavy-duty hole punch
- grommets
- setting tool
- hammer
You can find the grommets, punches, and setting tools at a fabric store like JOANN, or you can purchase grommet kits on Amazon.
How to Make DIY C0cktail Napkins
Now that you've gathered your supplies, let's get started.
Sewing the Napkins
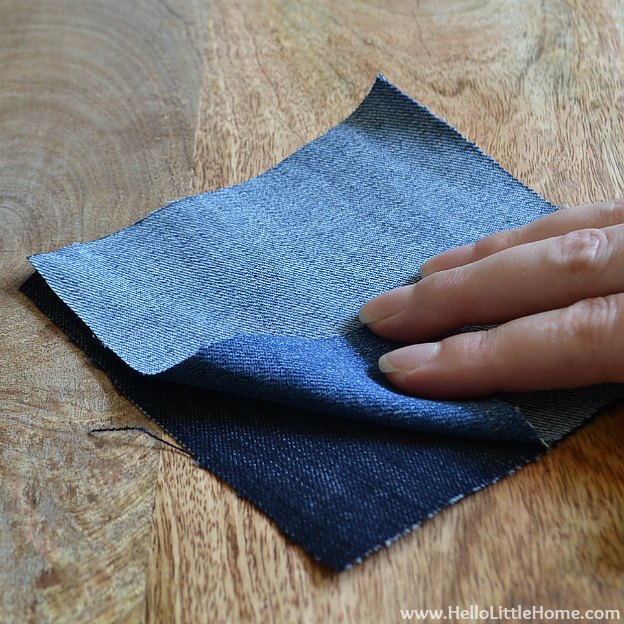
For each cocktail napkin, you'll need to cut two 5-inch squares from your fabric.
Start by sandwiching the right sides of the two squares together.
Sew a ½-inch seam all the way around the napkin, leaving a 1-inch opening on one end.
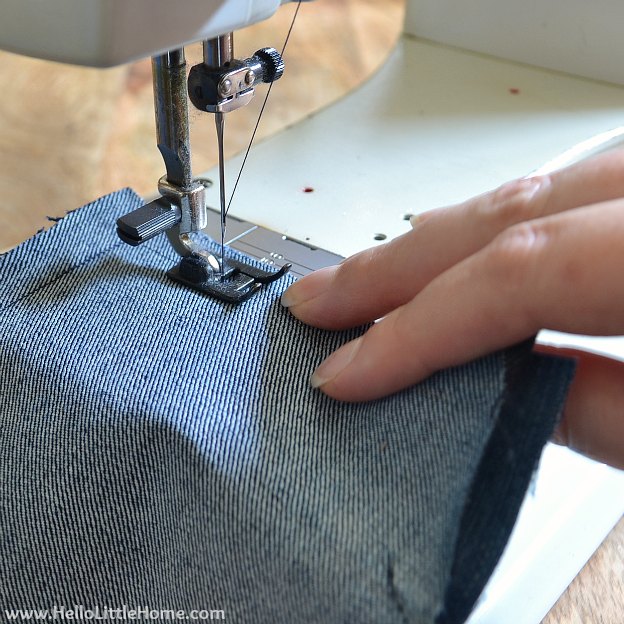
Clip the corners close to the stitching.
This will make it easier for you to get sharp corners when you turn the cocktail napkin right side out.

Use a hot iron and press the excess fabric toward the center of the napkin.
Repeat on the other side.
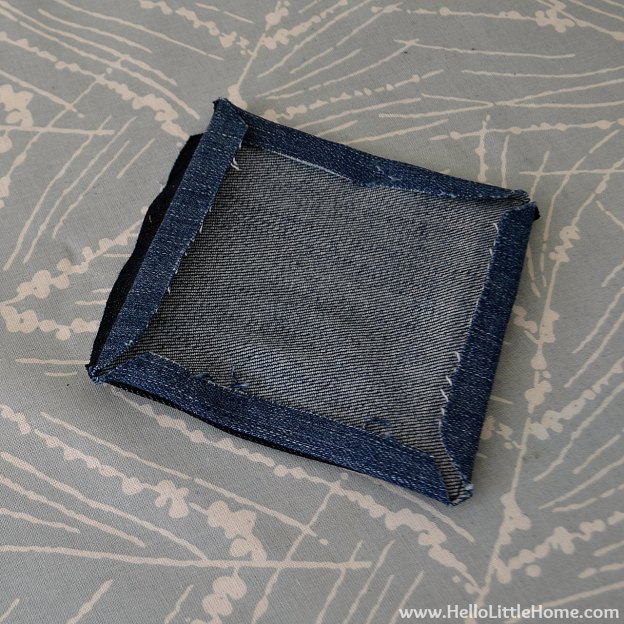
Turn the cocktail napkins right side out through the hole and then press them again.
Stitch the hole closed by hand or machine.

Inserting the Grommets
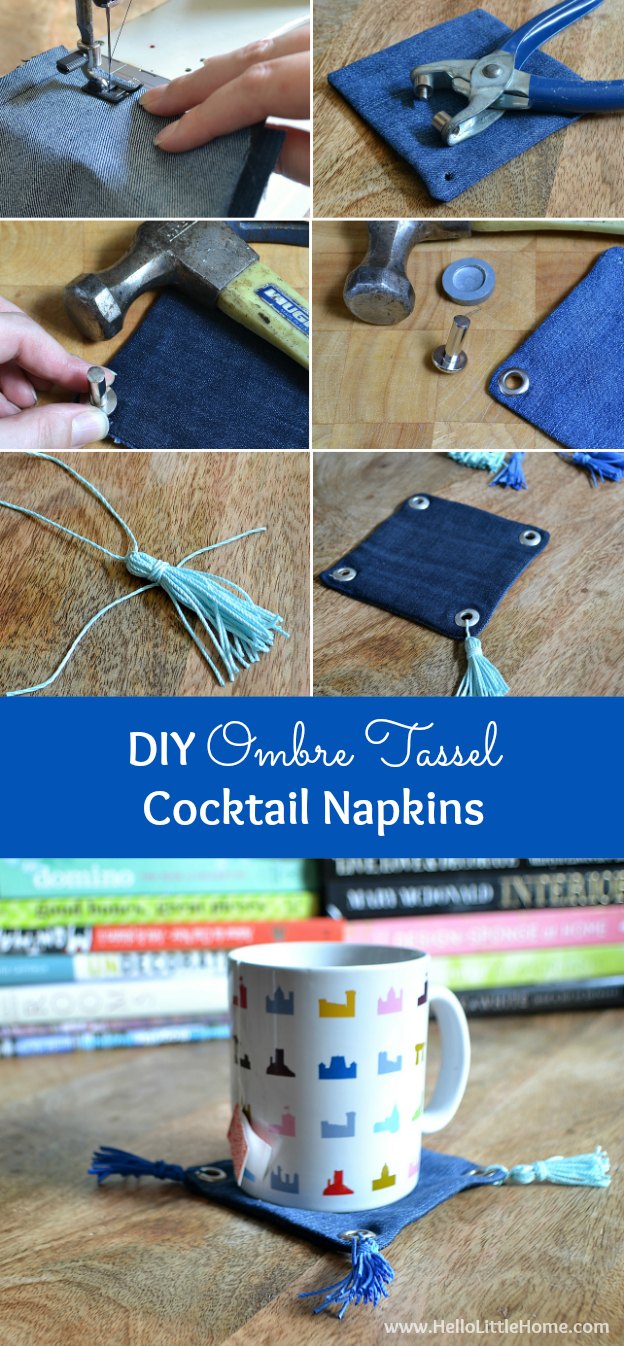
You'll insert the grommets next. Start by marking the hole placement about ½-inch from each corner (measure diagonally from the tip of the corner).
Then, use your hole punch and create a hole for each mark.
You'll insert the grommet next. Each grommet has two pieces. Choose the taller piece and insert it through the hole. After the tall piece has been inserted, lay the flat piece of the grommet over the tall piece.
Grab your setting tools (see lower right corner). Place the flat anvil piece under the grommet and then insert the setting tool in the grommet. Give the setting tool a good whack with your hammer, and voila, you have set the grommet!

Repeat this process for the remaining corners.
Making the Tassels
Next, you'll create the tassels. Begin by cutting out a 2 x 3-inch piece of heavy card stock or cardboard.
Wrap the cording around the 2-inch side of the card stock 14 times.
Cut a smaller piece of cording. Slide one end between the wrapped cording and card stock. Pull it up to the top of the wrapped cording and then tie it in a double knot.
Carefully slide the cording off the card stock and cut the bottom (the side that isn't tied) open.
Cut another small length of cording. Wrap it around the tassel about ¼-inch from the tied end 3 - 4 times. Tie the ends in a double knot. Trim the ends close to the knot.
Trim the ends of the tassel 1-inch from the wrap base, making sure they are even.
Repeat this process, creating 4 tassels for each cocktail napkin.

To attach the tassels to the cocktail napkin, simply stick one end of the cording holding the tassel together through a grommet.
Tie a tight double knot and trim the ends of the cording near the knot.

Repeat with the remaining tassels.
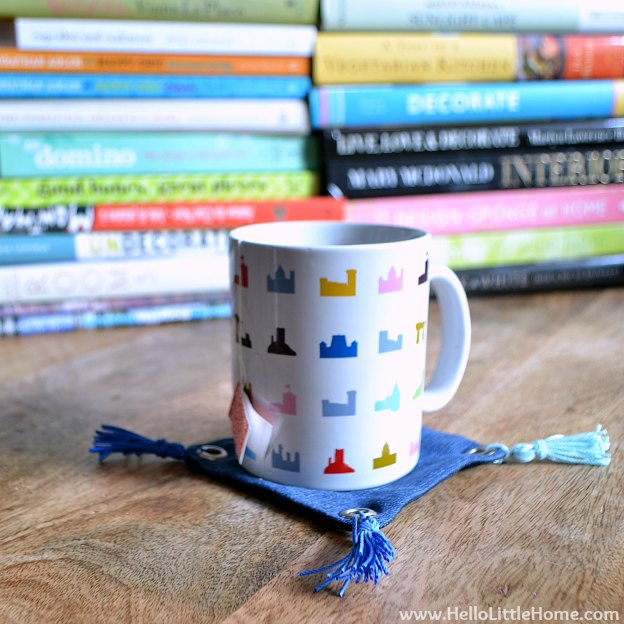
And you're done! Don't they look great?
If it's not quite happy hour, use the napkins for tea or coffee!
The cocktail napkins can also be decorated with ribbons or another trim instead of tassels. Get creative!
I'd recommend spot cleaning or handwashing these DIY Ombre Tassel Cocktail Napkins to help keep the tassels intact.

More DIY Coaster Ideas
If enjoyed making these Cocktail Napkins, check out some of my other DIY Coasters, too!
Love tassels? Then, you'll also like my DIY Suede Tassels, Tassel Necklace, and Tassel Wine Charms!
Have you worked on any fun DIY projects lately?
Soooooo beautiful I want to make some too! Thanks for the tutorial! It was a pleasure to feature it this week at From Dream To Reality!
What a cool idea! Pinned. Hugs! Lou Lou Girls
Thanks, Kimberly! They were so fun to make:)
I love this idea, I need to get some grommets so I can give this a bash! (see what I did there!!!)
Ha ha, Julie;) It's fun, definitely give it a try:)
..just as cute as can be...
Happy Tweaks
Thank you so much, BJ:)
these are great! I love the grommets!
Thanks, Marie! I'd never done grommets before. They took a little muscle, but were so fun!
I love these! VERY Anthro style! They steal my heart! 😀
Aww ... thank you so much, Heather! 🙂
This is just toooo cute! I think place mats or table runners done the same way would be neat. Thanks for sharing!
Thanks, Lisa! I had not even considered place mats or table runners, but I LOVE that idea!