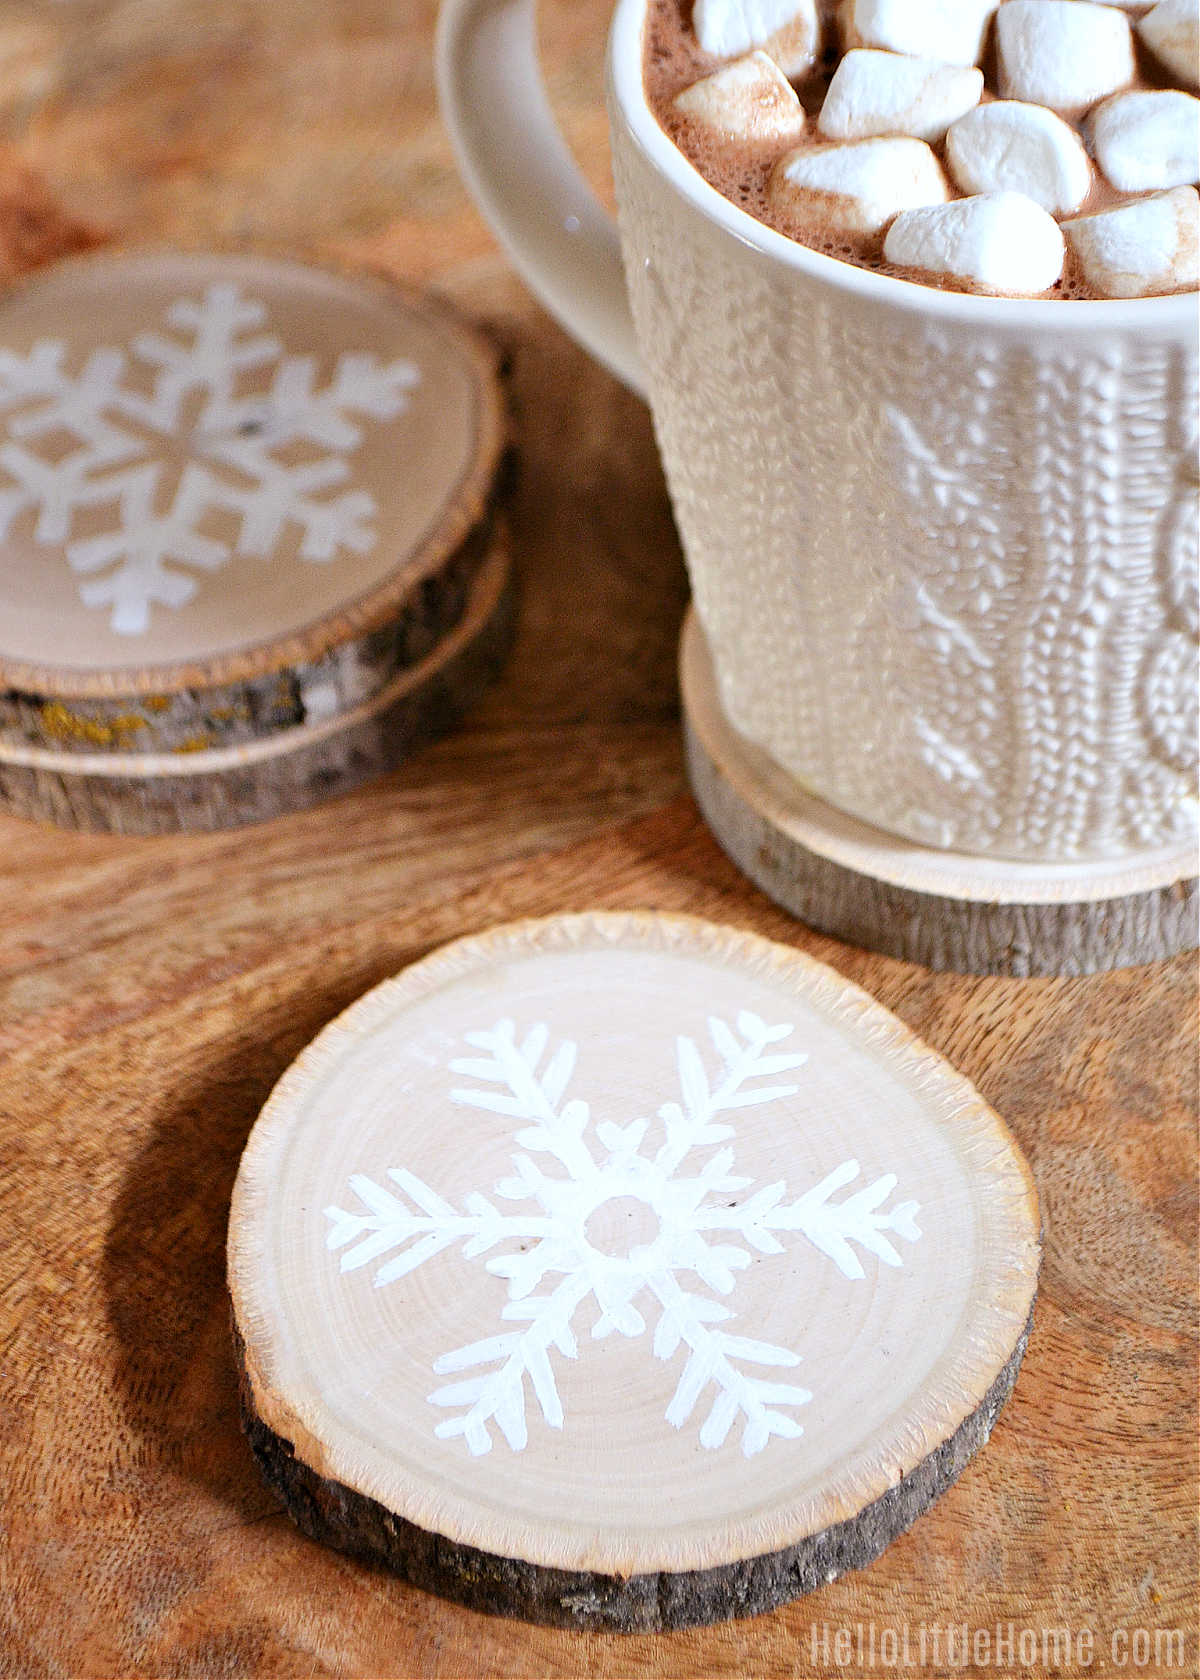
These DIY Snowflake Coasters are a fun and easy craft project you'll love ... perfect for decorating your home for winter or Christmas, and they make the wonderful holiday gift, too!

This post contains affiliate links. As an Amazon Associate I earn from qualifying purchases.
I love decorating my windows with cut out snowflakes at this time of year. It looks so pretty, and they're so fun to make ... it's one of those projects that reminds you of your childhood!
While visiting my local craft store, I found some wood slices in one of the aisles. After spending a few minutes wondering what to do with them, inspiration struck ... inspired by those snowflake-covered windows! And these cute Wood Slice Coasters are the result.
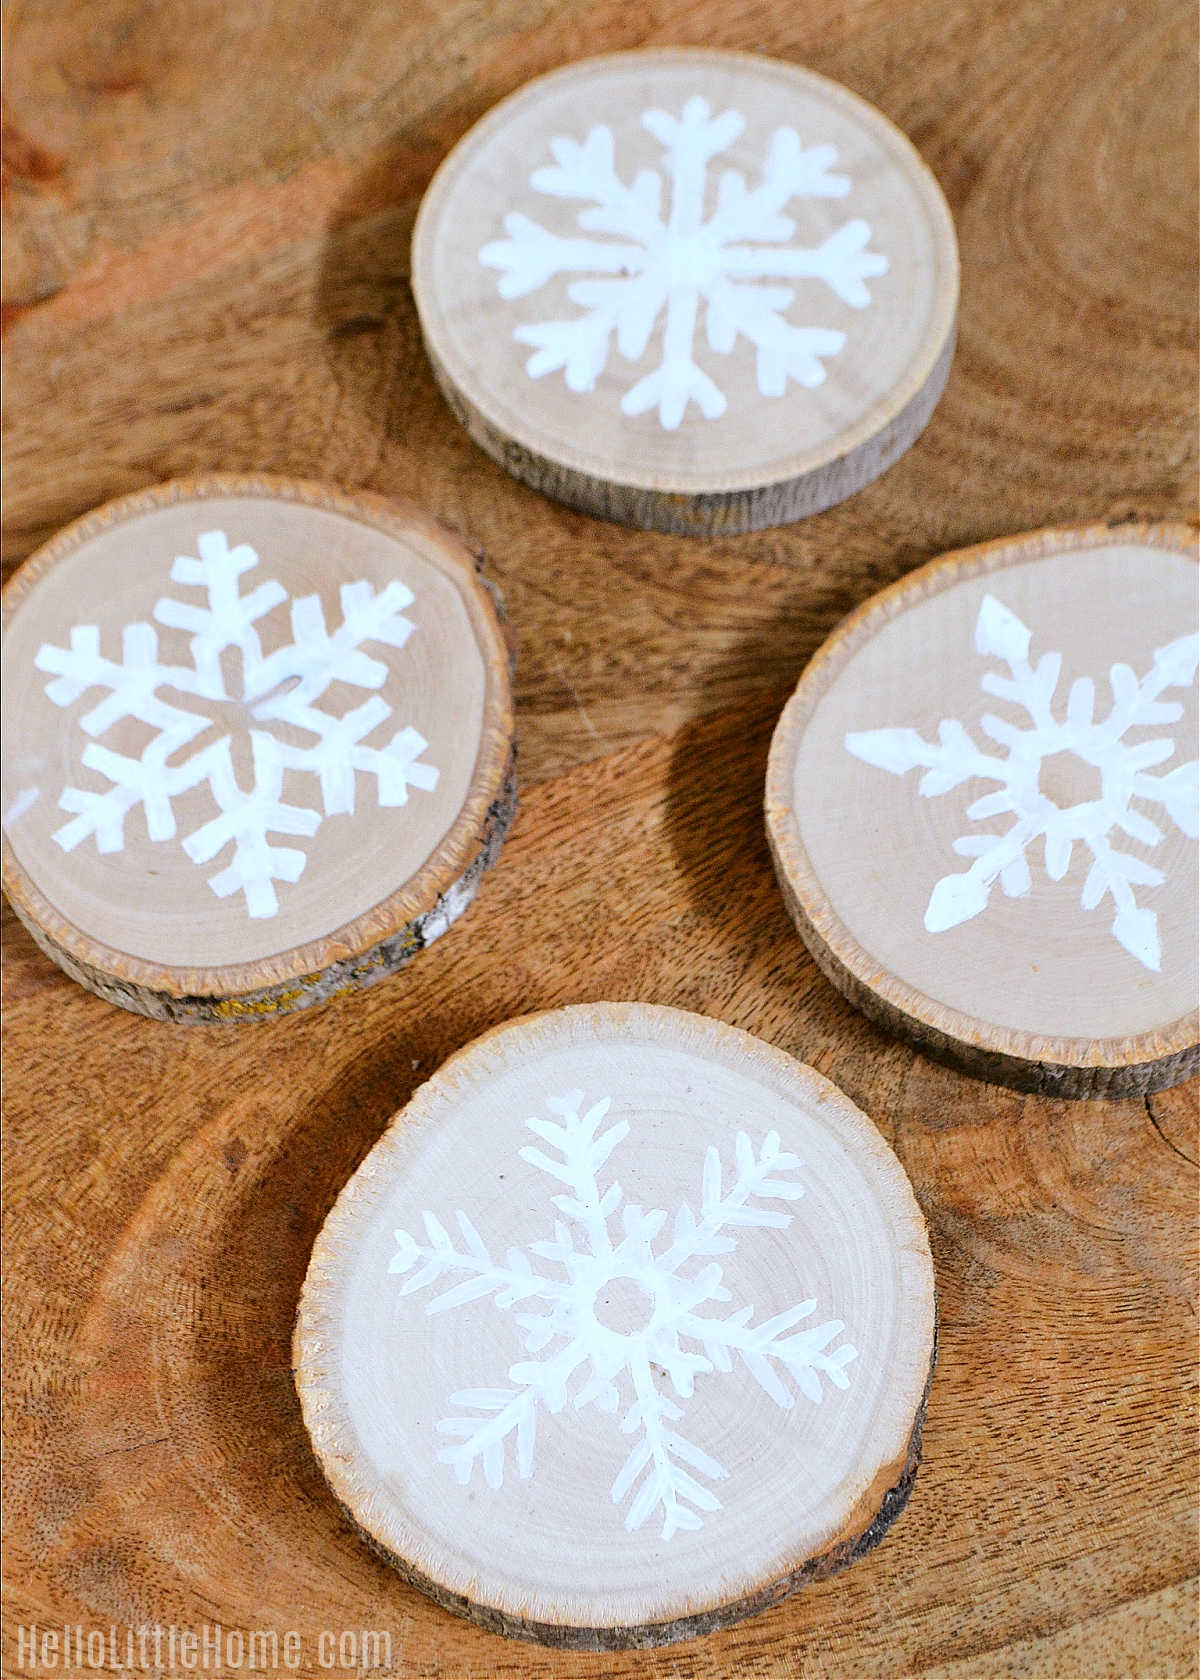
You are going to have so much fun making these DIY Snowflake Coasters! They're an elevated, rustic take on that favorite childhood craft, and they're surprisingly easy to make. I'm even sharing a free template to help you out!
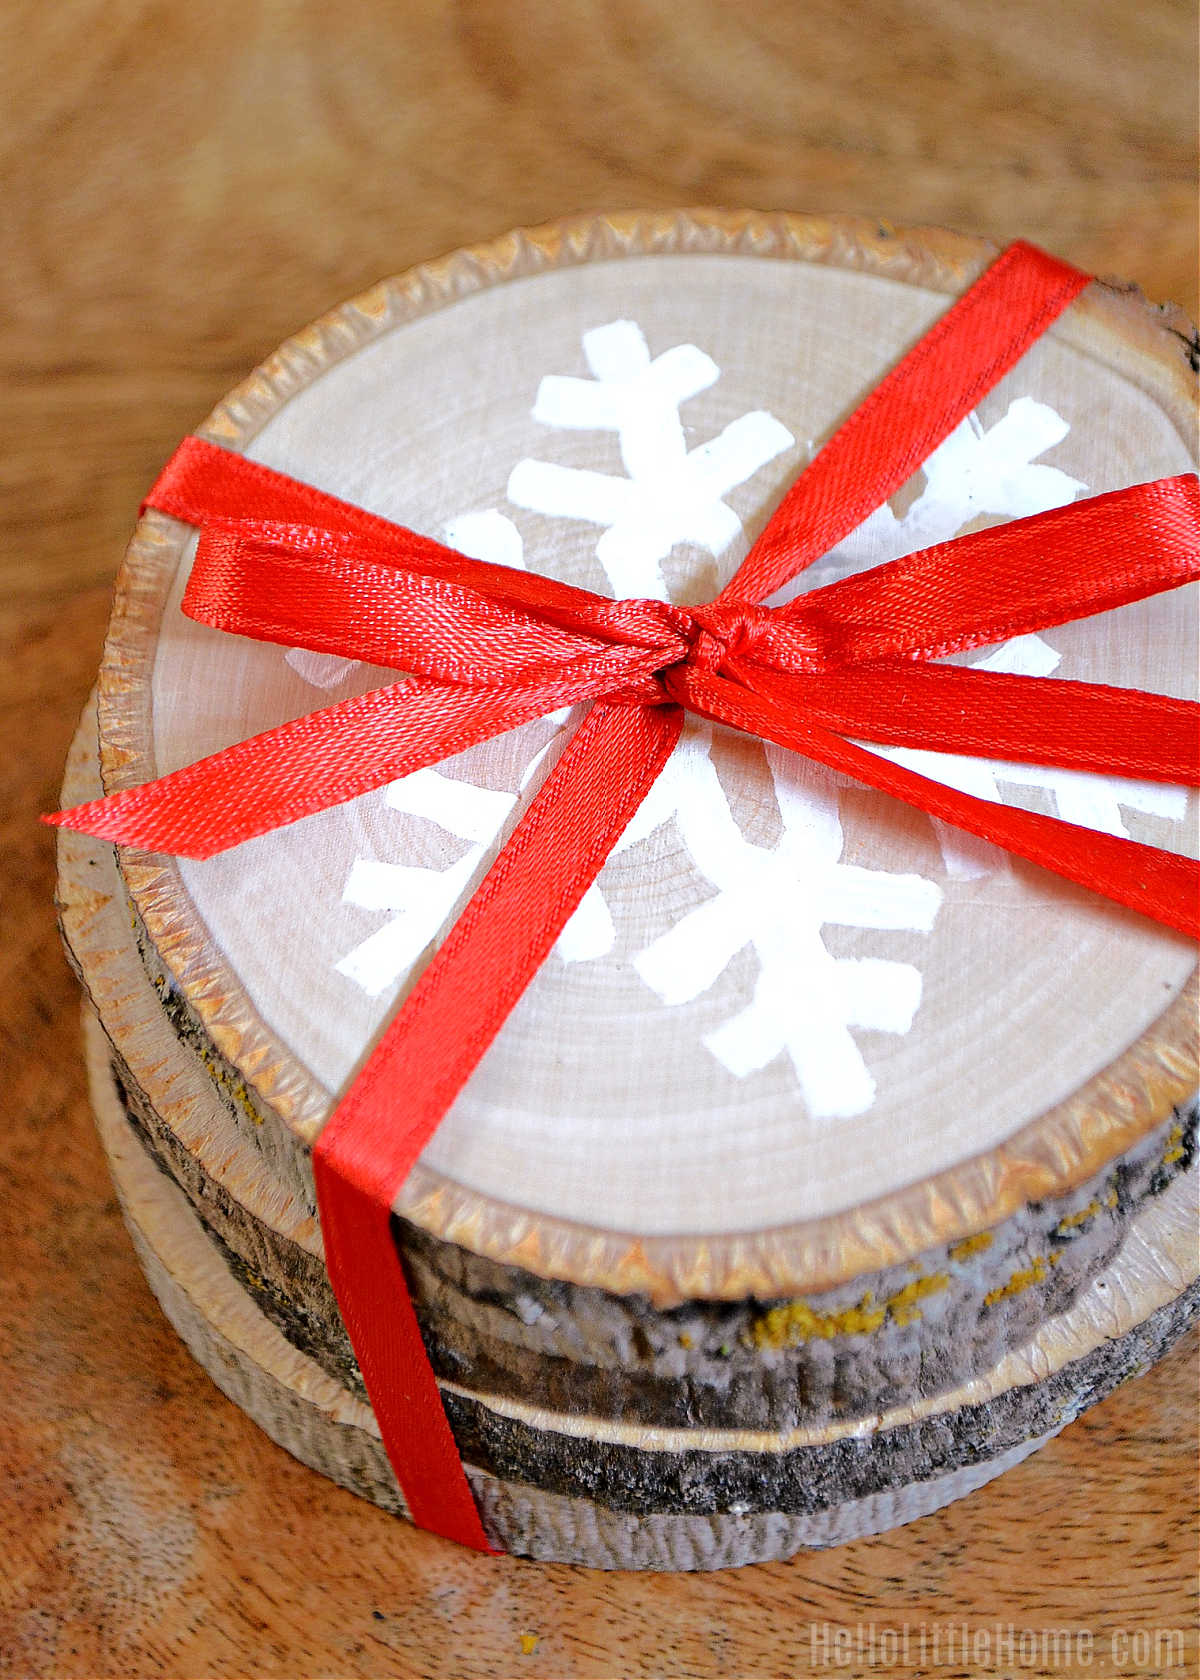
I like to haul out these Christmas coasters every holiday season, but they make a thoughtful DIY gift, too! You just need a little ribbon to wrap them up.
Want to make your own set? Keep reading for all the details, then start crafting!

Supplies
Here's what you'll need to make your own set of painted Wood Slice Coasters:
- Coasters - You'll need a set of unglazed tree slices to make the coasters. I found mine at Michaels, but these wood slices are similar. If you have access to a fallen tree branch and a saw, you could even make your own!
- Snowflake Template - Scroll to the end of this article to download the free printable snowflake template. If you're feeling creative, you could even paint your own designs free hand.
- Scissors - You'll need a pair of scissors to cut out the template.
- Tape - A few pieces of tape are needed to hold the template in place as you trace it.
- Pen - Grab a ball point pen to trace the snowflakes onto the coasters.
- Paint - White craft paint is easy to use (and clean up), making it perfect for creating the snowflake design.
- Paint Brush - You'll need a paintbrush with a slim tip to fill in the designs. If you don't have any, I suggest purchasing a small set of brushes. That way, you can try a few different sizes to see what works best for you.
- Sealant - To make the coasters waterproof, you'll want to finish them with a sealant, like this acrylic spray finish.

How to Make Snowflake Coasters
You'll be surprised by how simple these painted wood slice coasters are to make! Start by downloading and printing the snowflake template (find it below). Once you've done that, you can cut out circles.
Center the circular snowflake templates on your coasters. Then use a few small pieces of tape to hold the templates in place.

Using your ball point pen, trace the around the outsides of the snowflakes. As you do, press firmly.
When you're done, there should be a slight indentation on the coasters with your design.

Next, grab your paintbrush and fill in the snowflakes using the white craft paint. Take your time and don't worry if they aren't perfect. Mine sure weren't!
Tip: If you don't want to deal with paint and brushes, you can use a paint pen instead.

Let the paint dry for a few hours. Then spray the coasters with your waterproof sealant. For best results, add a few coats, letting the coasters dry completely in between each coat.
The sealant will protect your hand-painted coasters, creating a waterproof surface that won't stain after being used a few times.
Once the sealant is dry, your beautiful DIY Snowflake Coasters are ready to use! Wasn't that easy?
Gifting the Coasters
If you can bear to part with them, these DIY Wood Slice Snowflake Coasters make a wonderful holiday or Christmas gift! I tied the ones below together with a basic red ribbon ... simple, yet pretty!
Of course, you can get creative with the ribbon! This snowflake ribbon would look so cute, or you could choose a festive holiday plaid or once of these fun Christmassy designs.
Tip: Need help wrapping them up? Learn how to tie a perfect bow with my easy guide and video!
Printable Snowflake Template
To get the free snowflake template, click here to download the printable PDF or click anywhere on the image below. For best results, print the PDF at full size.

More Holiday Craft Ideas
Looking for more holiday craft ideas? Try one of these fun projects next:
- Christmas Grapevine Wreath
- DIY Christmas Card Holder
- Mini Christmas Trees
- DIY Vintage Christmas Ornaments
- Cardboard Gingerbread Ornaments
- Mini Christmas Stocking Pattern
- Silver and Gold Wreath
- DIY Origami Garland
Is it coaster crafts you're looking for? Then you'll love my Vintage French Map Coasters, Striped Burlap Coasters, DIY Monogram Coasters, and Ombre Tassel Cocktail Napkins, too!

DIY Snowflake Coasters
Materials
- snowflake template
- 4 wood slice coasters
- scissors
- transparent tape
- ball point pen
- white craft paint
- small paint brush
- waterproof sealant
Instructions
- Print out the snowflake template, then cut out the circles.
- Center the templates on the coasters, then use a few pieces of tape to hold them in place.
- Using the pen, trace around the outside of the snowflakes, pressing hard enough to leave a slight indentation in the wood below.
- Use the paint brush to fill in the snowflakes with the craft paint. Set aside to dry.
- When the paint is dry, add a few coats of sealant to the coasters. Make sure to let the sealant dry in between each coat.
- Once the sealant has dried, the coasters are ready to use. Enjoy!
Notes
